
Sauces & Condiments
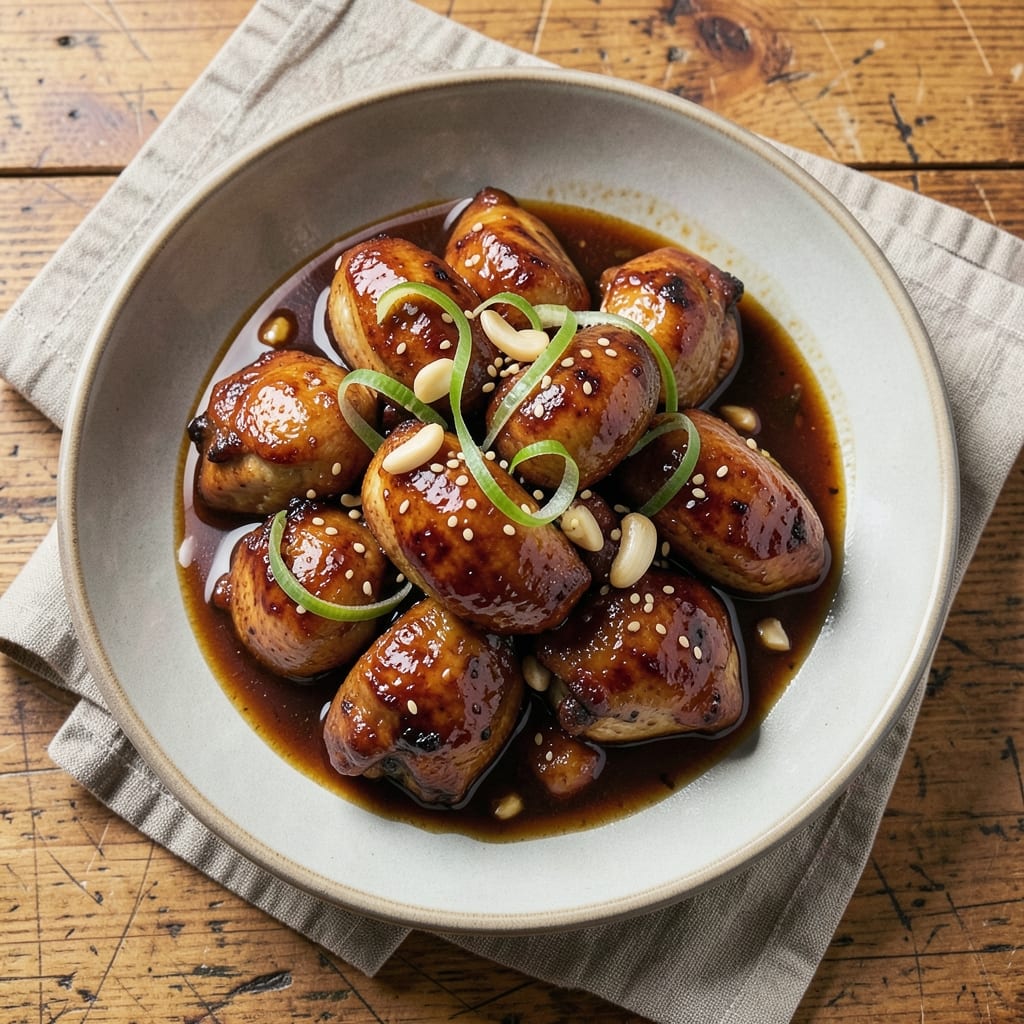
This braised soya sauce chicken recipe delivers restaurant-quality depth with just one pot and 30 minutes of active time. The secret lies in a slow-cooked sauce that transforms simple chicken thighs into tender, umami-rich bites with a glossy, caramelized glaze. I first perfected this technique during a Charleston market trip when I discovered how fermented soya sauce could elevate humble ingredients—now it's my go-to weeknight dinner.
The magic happens through two key techniques: first, searing the chicken until golden to build flavor, then braising it low and slow in a rich soya-based sauce. This method ensures the meat stays juicy while absorbing all that deep, savory goodness. The sauce reduces beautifully, creating a perfect balance of sweet, salty, and tangy notes that coat every bite. What you'll end up with is a dish that's elegant enough for company but simple enough for any night.
What makes this recipe particularly special is its versatility—it works equally well in a Dutch oven, Instant Pot, or even a heavy skillet. The sauce can be made ahead and reheated, making it perfect for meal prep. Serve it over steamed rice or with crusty bread to soak up every last drop of that flavorful braising liquid. This is comfort food at its finest, with professional-level results that come together without fuss.
For those who love authentic Asian flavors but want a streamlined approach, this recipe delivers. The soya sauce's complexity comes through in every bite, while the slow cooking ensures tender chicken that falls apart easily. It's the kind of dish that gets better as leftovers, with flavors deepening overnight. Let's get cooking—your taste buds will thank you.
Ingredients for braised soya sauce chicken
One pot, bold flavors, and chicken that falls apart with every bite.
| Ingredient | Amount | Notes |
|---|---|---|
| Boneless, Skinless Chicken Thighs 🍗 | 1 ½ lb | Cut into 2-inch pieces |
| Fermented Soya Sauce 🍶 | ½ cup | High-quality, not low-sodium |
| Brown Sugar 🍯 | ¼ cup | Packed, light or dark |
| Garlic Cloves 🧄 | 6 cloves | Minced, fresh preferred |
| Fresh Ginger 🌿 | 2 tbsp | Grated, peeled |
| Sesame Oil 🫒 | 1 tbsp | Toasted, not flavored |
| Rice Vinegar 🍶 | 2 tbsp | White or seasoned |
| Honey 🍯 | 1 tbsp | Wildflower or clover |
| Cornstarch 🌾 | 1 tbsp | For sauce thickening |
| Water 💧 | ½ cup | Room temperature |
| Vegetable Oil 🫒 | 2 tbsp | High smoke point |
| Green Onions 🧅 | 2 whole | Sliced, for garnish |
| Salt 🧂 | 1 tsp | Kosher or sea salt |
| Black Pepper 🌶️ | ½ tsp | Freshly ground |
The soya sauce is non-negotiable here. Kikkoman or Lee Kum Kee are my go-tos—they've got that deep, fermented punch. Grab the full-strength version, not the low-sodium kind. The chicken thighs should be bone-in if you can find them (they stay juicier), but boneless works too. I usually pick up mine from Trader Joe's since they're pre-cut and affordable. Look for thighs with good marbling—those little white specks of fat mean more flavor. The ginger and garlic? Fresh is a must. Dried spices just won't cut it for this dish.
No sesame oil? Toasted peanut oil works in a pinch, though it'll have a different flavor profile. Running out of rice vinegar? Substitute apple cider vinegar at the same amount. The honey can be swapped for maple syrup if you're vegan (though it'll be slightly less sweet). For the cornstarch slurry, just mix it with cold water first—no lumps, trust me. The green onions are optional but add that bright pop of color. If you're making this ahead, skip the garnish until serving—it wilts fast when reheated.
This sauce gets better overnight, so make extra if you can. Store leftovers in the fridge for up to 4 days—the flavors deepen like magic. Freezes beautifully for 3 months too. I always double the batch because it's perfect over rice or noodles. The chicken stays juicy when reheated, but if it's too dry, just add a splash of water or broth. Serve with steamed jasmine rice to soak up every last bit of that glossy, umami-rich sauce.
Why You'll Love This Recipe
- One-Pan Magic: I swear by this recipe when I’m too tired to scrub pots—just brown the thighs, toss in the soy sauce and ginger, and let it bubble away. The brown sugar caramelizes into a sticky glaze that’s basically chef’s kiss with zero effort.
- Umami Bomb: That fermented soy sauce? It’s the secret weapon—deep, salty-sweet, with a funk that cuts through the richness of the chicken. Add the garlic and ginger, and suddenly you’ve got restaurant-quality depth in a home-cooked dish.
- Leftovers That Shine: Between us, this dish tastes better the next day. The flavors meld into something richer, and reheating it on rice or noodles? Absolute win. I make a double batch just so I can enjoy it twice without the fuss.
- Budget-Friendly Feast: Chicken thighs are cheap, and this recipe stretches them into a meal that feeds four for under $10. The soy sauce and sugar add just enough luxury to feel special, but the grocery bill stays friendly—perfect for when you want to impress without breaking the bank.
Step-by-step instructions for braised soya sauce chicken
Here's how to create a rich, umami-packed dish that's simple yet deeply flavorful.
Prep the Chicken and Aromatics
Pat the 1.5 lb boneless, skinless chicken thighs dry with paper towels—this helps the sauce cling better. Cut them into 2-inch pieces and set aside. In a small bowl, combine the 6 cloves minced garlic, 2 tbsp grated fresh ginger, 1 tsp salt, and 0.5 tsp black pepper. Mix well so every piece of chicken gets that aromatic punch.
Next, create a dry marinade by whisking together the 0.5 cup fermented soya sauce, 0.25 cup packed brown sugar, and 1 tbsp sesame oil in a separate bowl. The brown sugar will caramelize slightly during cooking, adding depth to the sauce. Coat the chicken pieces thoroughly in this mixture and let them sit for 10 minutes while you prep the rest.
Sear the Chicken for Maximum Flavor
Heat 2 tbsp vegetable oil in a large Dutch oven or deep skillet over medium-high heat until shimmering. Add the chicken in a single layer, leaving space between pieces—this prevents steaming instead of searing. Cook undisturbed for 3-4 minutes until the chicken develops a deep golden-brown crust on all sides. Flip and repeat on the other side.
Once the chicken is nicely browned, remove it from the pot and set it aside. You'll notice the bottom of the pot has some beautiful browned bits—don't scrape them out! These are packed with flavor that will form the base of your sauce. Here's the thing—if the chicken pieces look like they're sticking, don't panic. Just add a splash of 0.25 cup water and let it bubble off before continuing.
Build the Braising Sauce
Reduce the heat to medium-low and add the garlic-ginger mixture to the pot, stirring for 30 seconds until fragrant. Pour in the 2 tbsp rice vinegar and 1 tbsp honey, letting it simmer for 2 minutes to blend flavors. Then, add the 0.5 cup water and bring everything to a gentle simmer.
Return the chicken to the pot, spooning the sauce over the top to coat it completely. The liquid should come about halfway up the chicken pieces. Here's where it gets good—cover the pot with a tight-fitting lid and let it cook on low heat for 30-35 minutes. You want the chicken to cook slowly and absorb all those rich flavors without drying out.
Thicken and Finish the Sauce
After the initial braising time, check the sauce consistency. If it's too thin, mix the 1 tbsp cornstarch with 2 tbsp water in a small bowl until smooth, then stir it into the pot. Simmer uncovered for 5-7 minutes until the sauce thickens to your desired consistency—it should coat the back of a spoon but still be saucy, not gluey.
Taste and adjust seasoning if needed. I usually add a splash more soya sauce if it needs more umami depth. Once the sauce is perfect, remove the pot from heat and let it rest for 5 minutes. This gives the flavors time to meld together beautifully. Garnish with 2 sliced green onions just before serving.
Serve with Perfectly Braised Chicken
Transfer the chicken and sauce to a serving platter, spooning the rich sauce over the top. The chicken should be fork-tender with a glossy, caramelized glaze. Serve immediately over steamed rice or noodles to soak up every last bit of that incredible sauce. This dish tastes even better the next day, so it makes great leftovers too!
Pro Tips For Making Braised Soya Sauce Chicken
- Brown the Chicken First: Skip the slow start—sear the thighs in a hot pan for 3-4 minutes per side until deep golden. I learned this the hard way: rushing the braise without browning first leaves you with pale, flavorless chicken. The caramelized crust locks in juices and builds the sauce’s depth.
- Grate the Ginger Fine: No need for a microplane—just use the largest holes of a box grater and rub it vigorously. Coarse ginger burns faster and settles to the bottom, leaving your sauce unevenly spiced. Fine grating ensures every bite gets that bright, aromatic kick.
- Deglaze with Soya Sauce: After browning the chicken, splash in 2 tablespoons of soya sauce immediately—it’s the only time you’ll use it for deglazing. This step dissolves the fond (those sticky bits) and jumpstarts the sauce’s umami. Skipping it means a thinner, less flavorful braise.
- Simmer Low and Slow: Cover the pot and simmer at a bare bubble—no rolling boil, no rushing. I used to crank the heat and end up with a watery mess. Thirty minutes at low heat lets the chicken tenderize while the sugar caramelizes naturally, not burns. Patience here makes all the difference.
Dietary considerations for this dish
Gluten-Free Adaptations
For a gluten-free version, simply swap the fermented soya sauce for a gluten-free tamari—it delivers the same umami depth without gluten. I recommend San-J Tamari or Edamame Tamari for authentic flavor. The rest of the recipe stays exactly the same since no other ingredients contain gluten. Always double-check labels, though, as some brands may process soy sauce in gluten-containing facilities. 🌱
Low-Sodium Options
If you're watching your sodium intake, reduce the soya sauce to ¼ cup and add ½ cup low-sodium chicken broth to the braising liquid. This keeps the umami flavor while cutting the salt significantly. For extra depth, add 1 tsp fish sauce or ½ tsp soy sauce powder—both pack umami without as much sodium. Taste as you go and adjust gradually.
Dairy-Free and Egg-Free
This recipe is naturally dairy-free and egg-free, making it safe for most dietary restrictions. The sauce relies solely on fermented soya sauce, vinegar, and natural sweeteners. For added richness, stir in 1 tbsp coconut aminos (a gluten-free alternative) or a splash of vegan Worcestershire sauce at the end. The texture and flavor remain perfectly balanced without dairy or eggs.
High-Protein Boost
Want to increase the protein content? Add ½ cup cooked quinoa or ½ cup edamame to the braising liquid during the final 10 minutes of cooking. Both absorb the sauce beautifully while adding plant-based protein. For meat lovers, toss in ½ cup sliced mushrooms—they soak up the sauce and add an earthy depth that pairs perfectly with the chicken. 💪
Meal Prep Friendly
This dish is a meal prep dream—it reheats beautifully and tastes even better the next day. Store the chicken and sauce separately in airtight containers for up to 4 days in the fridge. When reheating, add 1-2 tbsp water or broth to prevent drying out. For freezing, portion into single-serving containers with sauce and freeze for up to 3 months. Thaw overnight in the fridge before reheating gently on the stovetop.
Kid-Friendly Tweaks
To make this recipe more appealing to picky eaters, reduce the garlic to 3 cloves and add ½ tsp sugar to the sauce for a milder, sweeter profile. Serve the chicken shredded over white rice or buttered noodles to make it more familiar. For extra fun, let kids sprinkle crushed peanuts or sesame seeds on top before serving. The umami flavor remains, but the presentation feels more approachable. 👨👩👧👦
Nutrition facts
Frequently asked questions
Can I use chicken breasts instead of thighs?
Chicken breasts will work, but they're leaner and more prone to drying out. If using breasts, cut them into 1-inch pieces and reduce the braising time to 20-25 minutes. Add 1 tbsp water if the sauce looks too thick during cooking. For best results, pound the breasts slightly to even thickness before cooking.
What if I don't have a Dutch oven?
No problem! Use a heavy skillet with a tight-fitting lid or even a slow cooker. For the skillet, cook on medium heat and reduce braising time to 25 minutes. In a slow cooker, combine all ingredients (except cornstarch) and cook on low for 3 hours. Thicken the sauce separately with cornstarch slurry before serving.
How do I make the sauce less sweet?
Reduce the brown sugar to 2 tablespoons and add 1 extra tablespoon of rice vinegar to balance the sweetness. For more depth, increase the soya sauce to ⅔ cup and add ½ teaspoon of fish sauce for umami. Taste as you go—small adjustments make a big difference!
Can I make this in an Instant Pot?
Sear the chicken first in a separate pan, then add it to the Instant Pot with all ingredients except cornstarch. Cook on high pressure for 10 minutes, then quick-release. Thicken the sauce with cornstarch slurry on the stovetop. The pressure method keeps the chicken incredibly tender.
Why did my chicken turn out dry?
Overcooking or insufficient liquid are the most common causes. Always braise on low heat and keep the liquid level at least halfway up the chicken. If using breasts, reduce time to 20-25 minutes. For extra moisture, add 2-3 tablespoons of water or broth during cooking. The sauce should be glossy, not dry.