
Sauces & Condiments
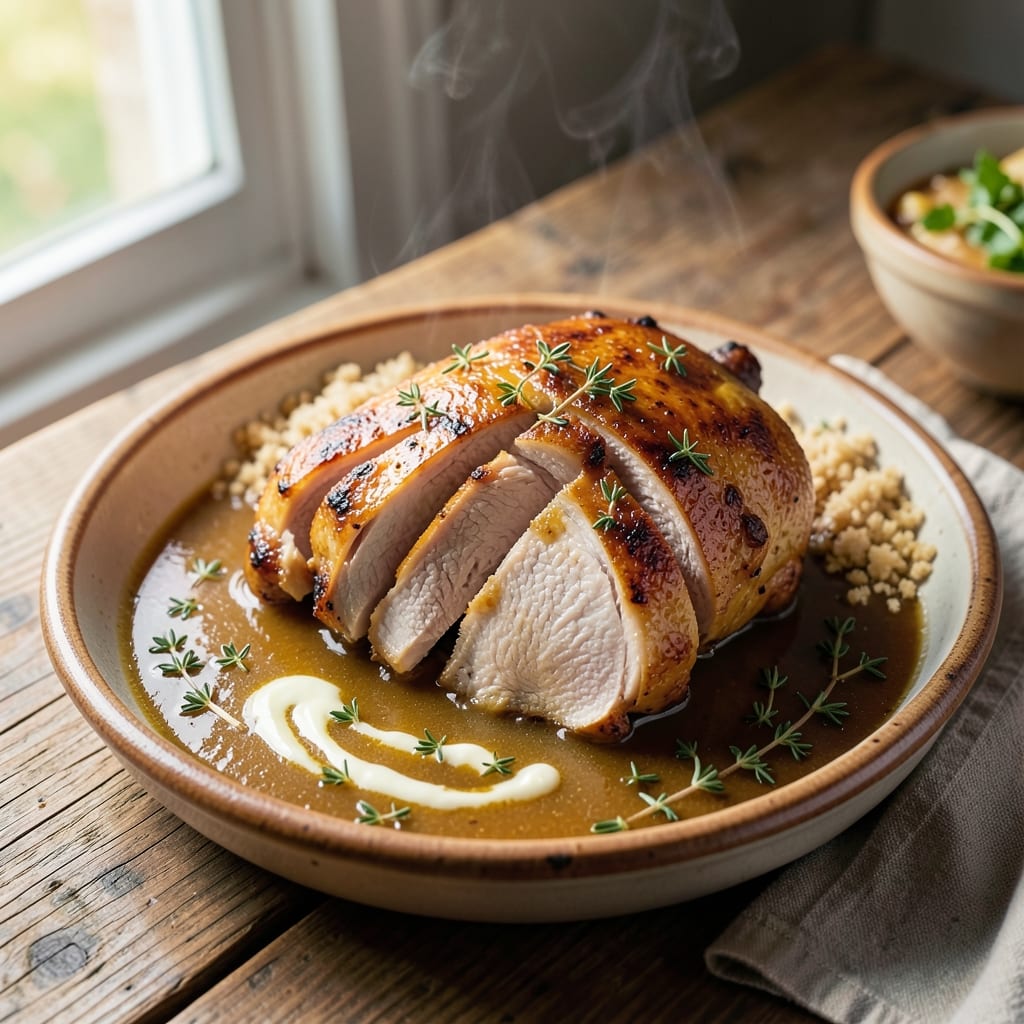
This is the best roast chicken gravy recipe ever—transforming simple pan drippings into velvety, restaurant-quality sauce—the kind that clings to every bite and makes your holiday table feel like a five-star meal. 🔥 The secret lies in capturing those golden crispy bits while building a rich, silky texture through precise roux technique. I've perfected this method after years of testing, and it consistently delivers gravy so good, guests will ask for the recipe.
What sets this apart is the balance of techniques: deglazing the pan with chicken stock to lift flavorful browned bits, creating a light roux to thicken without overpowering, and simmering just long enough to develop depth. Every step matters—skimming excess fat ensures a cleaner finish, while straining removes impurities for that silky mouthfeel. The result is a gravy that's rich yet not greasy, with just the right amount of body to coat roasted vegetables and mashed potatoes beautifully.
This isn't your basic drippings—it's a sauce that transforms an ordinary roast chicken into the centerpiece of your meal. The crispy pan bits add texture and umami depth, while the proper thickening technique ensures it's neither too thin nor gluey. We'll build flavor through aromatics like thyme and bay leaf, then finish with a touch of lemon to brighten the richness. The difference between good gravy and extraordinary gravy comes down to these precise techniques.
Perfect for holiday dinners, Sunday roasts, or any occasion where you want that restaurant-quality finish. The method scales easily whether you're serving 4 or 12, and the leftovers reheat beautifully. Here's how to make gravy that will have everyone reaching for seconds—and asking for the recipe.
Ingredients for best roast chicken gravy recipe ever
Transform ordinary pan drippings into velvety, restaurant-quality gravy with these magic ingredients.
| Ingredient | Amount | Notes |
|---|---|---|
| Chicken Pan Drippings 🍗 | 1 ½ cups | From roasted chicken, including crispy bits |
| Chicken Stock 💧 | 1 cup | Homemade or high-quality store-bought |
| All-Purpose Flour 🌾 | 2 tbsp | For perfect light roux |
| Unsalted Butter 🧈 | 2 tbsp | Cold, cut into small pieces |
| Fresh Lemon Juice 🍋 | 1 tbsp | Brightens the gravy |
| Fresh Thyme Leaves 🌿 | 2 tsp | Or 1 tsp dried thyme |
| Bay Leaves 🌿 | 1 whole | Removed before serving |
| Salt 🧂 | ½ tsp | Adjust to taste |
| Black Pepper 🌶️ | ¼ tsp | Freshly ground |
| Crispy Chicken Pan Bits 🍗 | 1 tbsp | Reserved from roasting |
Those crispy pan bits are gold—don't skip them! Save them in a small jar while the chicken rests, or scrape them from the pan immediately after roasting. The chicken stock matters too—homemade has more depth, but Pacific Foods or Swanson are solid store-bought options. For the butter, grab the European-style kind if you can—it has more flavor. Fresh thyme is ideal, but dried works in a pinch (use half the amount). The bay leaf adds subtle earthiness—don't skip it unless you're serving kids who hate surprises.
No chicken stock? Substitute with beef stock (it's richer) or even extra water (though flavor will be milder). Ran out of butter? Olive oil works in a pinch, but it changes the texture slightly. The flour is non-negotiable for thickening—cornstarch will make it gluey. Want extra richness? Add 1 tbsp of cream at the end. For a quicker version, skip the roux and whisk flour directly into the hot drippings, but you'll lose that silky texture. The lemon juice is key—it cuts through the richness and brightens everything.
This gravy reheats beautifully—just warm it gently on the stove, stirring constantly. Keeps for 3-4 days in the fridge, or 3 months frozen. For freezer storage, cool completely first, then portion into ice cube trays before transferring to a jar. The crispy bits add amazing texture, but if you're serving kids, you can strain them out. Double the recipe—it disappears faster than you think, especially when you're the one making it!
Why You'll Love This Recipe
- Pan Drippings Magic: I swear by this trick—just skim the fat from your roast chicken pan, and boom, you’ve got the base for gravy that tastes like it simmered all day. No extra ingredients needed; it’s the secret weapon in my Sunday dinner rotation.
- Lemon-Zing Lift: That bright splash of fresh lemon juice cuts through the richness, giving it a finish that’s fresh but still cozy. It’s the one tweak that makes this gravy feel like a restaurant-worthy upgrade, not just a side dish.
- Leftovers Reinvented: Stash extra gravy in the fridge—it’s perfect for drizzling over mashed potatoes the next day or turning a sad sandwich into a meal. I’ve even used it to deglaze pans for weeknight stir-fries. Versatility at its finest.
- Budget-Friendly Luxury: Butter and flour cost pennies, and chicken stock stretches like crazy. This gravy proves you don’t need fancy ingredients to feel like you’re serving something special. My wallet and taste buds agree.
Step-by-step instructions for pan sauce magic with crispy bits
Here's how to transform simple roasting drippings into the richest, crispiest gravy you've ever tasted.
🍳 Step 1: Melt Butter and Whisk in Flour
Place your roasting pan over medium heat and add the 2 tbsp unsalted butter, letting it melt completely. Here's the thing—don't rush this. You want the butter to foam and then settle into a gentle sizzle before you add anything else.
Once the butter is melted and the pan is warm (about 2-3 minutes), sprinkle in the 2 tbsp all-purpose flour all at once. Immediately grab a wooden spoon and whisk vigorously for 1-2 minutes until you get a smooth, pale roux. This creates the perfect thickening base for your gravy. If it starts to darken, reduce the heat slightly—you're aiming for nutty brown, not burnt.
🍳 Step 2: Deglaze with Pan Drippings and Stock
Now for the magic: slowly pour in the 1.5 cups chicken pan drippings while whisking constantly. You'll see those crispy browned bits at the bottom of the pan start to lift and incorporate into the sauce. This is where all the flavor happens—don't skip the whisking!
After the drippings are fully incorporated, add the 1 cup chicken stock and the 1 whole bay leaf. Bring everything to a gentle simmer, then reduce the heat to low-medium. Let it cook uncovered for 8-10 minutes, stirring occasionally, until it thickens enough to coat the back of a spoon. You're looking for a glossy, velvety consistency—not too thick, but not watery either.
🥘 Step 3: Season and Finish with Crispy Bits
Remove the pan from heat and stir in the 1 tbsp crispy chicken pan bits, 2 tsp fresh thyme leaves, 1 tbsp fresh lemon juice, 0.5 tsp salt, and 0.25 tsp black pepper. The crispy bits add incredible texture contrast to the silky sauce, and the lemon juice brightens everything up. Taste and adjust the seasoning—you might need a tiny bit more salt depending on how salty your roasted chicken was.
Real talk: this is where the gravy goes from good to absolutely incredible. The crispy bits should be evenly distributed throughout, adding little bursts of texture with every bite. If the gravy seems too thick after adding the crispy bits, you can thin it with a splash of hot water or more chicken stock.
⏰ Step 4: Strain and Serve Immediately
For the smoothest texture, strain the gravy through a fine-mesh sieve into a clean saucepan. This removes any herb stems or large crispy bits if you prefer a completely smooth sauce. Return it to low heat to keep it warm while you serve.
Here's the key: serve this gravy immediately over your roasted chicken. The contrast of the crispy chicken skin with the velvety, herby gravy is what makes this dish legendary. If you need to reheat later, do so gently over low heat and stir constantly to prevent it from breaking or burning.
Pro Tips For Making Best Roast Chicken Gravy Recipe Ever
- Scrape the Pan Dry: That last bit of crispy browned bits stuck to the roasting pan? Don’t just pour in liquid—scrape them up with a wooden spoon first. Those bits are pure flavor, and skipping this step means you’re leaving behind the most concentrated, savory base for your gravy. I used to ignore this, and my gravy always tasted like it was missing something.
- Bloom the Flour Slowly: When you toss in the all-purpose flour, turn the heat down to medium-low and let it cook for a full 2 minutes before adding stock. This blooms the flour properly, so your gravy thickens smoothly instead of clumping like glue. After burning through three batches of lumpy gravy, I finally learned patience here—yes, even if you’re impatient like me.
- Strain Twice, Once Rough: After simmering, strain the gravy through a fine-mesh sieve first, then a cheesecloth or coffee filter for a silky finish. The sieve catches big bits, but the cheesecloth removes those microscopic chicken fibers that make gravy look cloudy. Sounds weird, but it works—your gravy will look restaurant-worthy, not homemade.
- Lemon Last, Not First: Add the fresh lemon juice after the gravy has thickened and simmered for 5 minutes. If you add it too early, the acid can break down the flour’s thickening power, leaving you with a runny mess. A squeeze at the end brightens the flavor without ruining the texture—trust the process.
Regional styles of this dish
Southern Comfort Gravy
This classic Southern version keeps the rich, velvety texture but adds a touch of cornmeal for extra thickness and a hint of smoked paprika for depth. Use ½ cup cornmeal instead of flour in the roux, and add ½ teaspoon smoked paprika when finishing. Serve it over buttermilk mashed potatoes or cornbread for that true Southern experience. 🌶️
French-Inspired Pan Sauce
For a more refined approach, transform this gravy into a sauce au jus by adding 1 cup dry white wine when deglazing the pan. Strain out the bay leaf and thyme, then finish with 1 teaspoon Dijon mustard and a splash of crème fraîche for a silky, slightly tangy sauce. Perfect for serving with roasted duck or herb-crusted chicken. 🍷
English Yorkshire Style
The British version of this gravy is all about richness and simplicity. Use beef stock instead of chicken stock, and add 1 teaspoon Worcestershire sauce when finishing. Skip the lemon juice and replace it with 1 teaspoon apple cider vinegar for a subtle tang. This gravy pairs beautifully with roast beef or Yorkshire pudding. 🇬🇧
German-Inspired Dark Gravy
For a heartier, deeper flavor, this German-style gravy uses dark beer and caramelized onions. Deglaze the pan with ½ cup dark beer (like Schwarzbier) and sauté ½ cup thinly sliced onions until golden before adding the flour. Finish with 1 teaspoon caraway seeds for a unique twist. Serve with roast pork or potatoes. 🍺
Italian Herb Gravy
Give your gravy an Italian flair by adding 1 teaspoon dried rosemary and ½ teaspoon red pepper flakes when finishing. Use white wine instead of stock for deglazing, and finish with a sprinkle of grated Parmesan cheese. This gravy shines with roasted chicken or pasta dishes. 🌿
Modern Twist with Umami
For a contemporary take, boost the umami with 1 teaspoon fish sauce or ½ teaspoon soy sauce when finishing. Add a touch of honey (about ½ teaspoon) to balance the richness. This gravy works beautifully with glazed carrots or roasted Brussels sprouts. 💫
Nutrition facts
Frequently asked questions
Why does my gravy turn out lumpy?
Lumpy gravy happens when the roux isn't properly blended or the liquid is added too quickly. Always whisk constantly when combining flour and liquid, and use a light roux (just until it stops bubbling). If lumps appear, strain the gravy through a fine-mesh sieve for a silky finish.
Can I make this gravy without a roux?
Yes, but the texture won't be as rich. Whisk 2 tbsp flour directly into the hot drippings, then add stock and simmer until thickened. For extra flavor, add 1 tbsp cornstarch mixed with cold water instead. The roux method creates a velvety texture that's hard to beat!
How do I fix gravy that's too thick or too thin?
For thick gravy, thin it with 1-2 tbsp hot chicken stock or water while whisking. If it's too thin, mix 1 tsp cornstarch with 1 tbsp cold water, stir it in, then simmer for 1-2 minutes. Always adjust gradually—you can't fix it if you overcorrect!
Should I use fresh or dried herbs in gravy?
Fresh herbs (like thyme) add vibrant flavor, but dried works in a pinch. Use half the amount of dried herbs (e.g., 1 tsp dried thyme instead of 2 tsp fresh). For best results, add fresh herbs at the end and strain them out if you prefer a smooth sauce.
Can I make this gravy ahead of time?
Yes! Store it in an airtight container in the fridge for 3-4 days or freeze for 3 months. Reheat gently over low heat, stirring constantly to prevent lumps. For best texture, reheat only until warm—overheating can break the emulsion.