
Main Courses
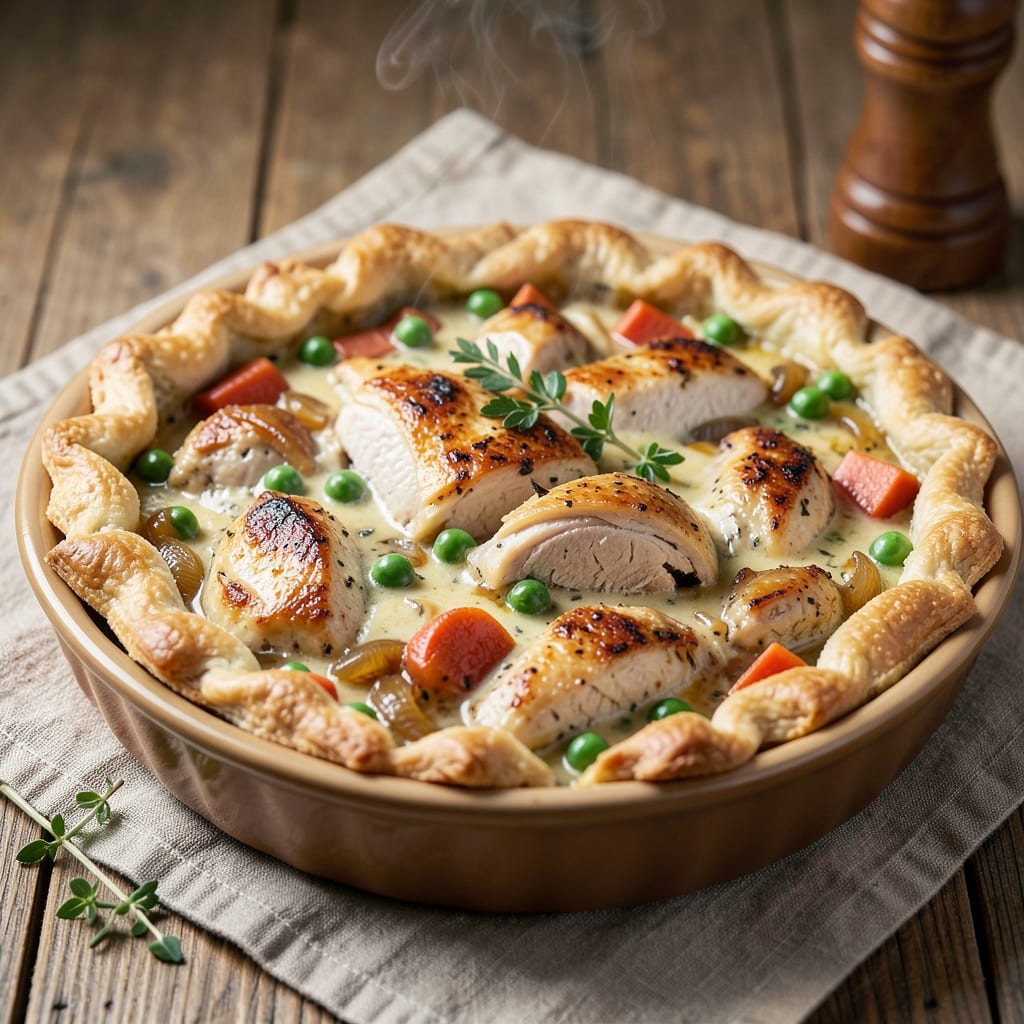
This big chicken pot pie recipe delivers the ultimate comfort food experience with a golden, flaky crust and rich, savory filling that tastes like home. The secret lies in a perfectly balanced filling—tender chicken, seasonal vegetables, and a velvety gravy—all encased in a buttery, lattice-topped crust that bakes to crispy perfection. I developed this recipe after years of testing, ensuring every bite delivers that satisfying harmony of textures and flavors.
The filling starts with juicy chicken thighs and breasts, simmered until fork-tender, then combined with carrots, peas, and onions for a classic vegetable medley. A homemade gravy—thickened with a roux and enriched with cream—binds everything together, creating a luscious, flavorful base. For the crust, I recommend a classic puff pastry for that signature flakiness, though a pie crust works beautifully too if you prefer a sturdier option.
What sets this pot pie apart is the balance of techniques: slow-cooked chicken for tenderness, a proper roux for gravy depth, and a hot oven for a golden, bubbling crust. The result is a pot pie that’s hearty enough for a family dinner but elegant enough for company, with a filling that’s rich and satisfying while the crust remains light and crisp. The aroma alone will have everyone gathering around the table.
Whether you're making it for a cozy weeknight or a special occasion, this recipe scales easily and reheats beautifully. Serve it with a simple green salad or crusty bread to soak up every last bit of that savory gravy. The flaky crust and tender filling make this pot pie a timeless classic that never goes out of style.
Ingredients for big chicken pot pie
Pantry staples plus a few fresh ingredients for that classic pot pie comfort.
| Ingredient | Amount | Notes |
|---|---|---|
| Chicken Thighs 🍗 | 1 ½ lb | Bone-in, skin-on preferred |
| Chicken Breasts 🍗 | 1 ½ lb | Boneless, skinless, cut into bite-sized pieces |
| Yellow Onions 🧅 | 2 whole | Medium, diced |
| Carrots 🥕 | 1 ½ lb | Peeled, sliced into rounds |
| Frozen Peas 🌽 | 1 ½ cups | Thawed, no need to drain |
| All-Purpose Flour 🌾 | ½ cup | For gravy roux |
| Unsalted Butter 🧈 | ¾ cup | Cold, cut into pieces |
| Heavy Cream 🥛 | 1 cup | Full-fat for richness |
| Chicken Broth 💧 | 2 cups | Low-sodium preferred |
| Puff Pastry 🥧 | 1 sheet | Thawed if frozen, for lattice crust |
| Egg 🥚 | 1 whole | Beaten, for egg wash |
| Salt 🧂 | 1 ½ tsp | Kosher or sea salt |
| Ground Black Pepper 🌶️ | ½ tsp | Freshly ground preferred |
| Fresh Thyme 🌿 | ¼ cup | Chopped, or 1 tbsp dried |
| Garlic Cloves 🧄 | 4 cloves | Minced, for flavor depth |
The chicken makes or breaks this—bone-in thighs stay juicier, but breasts work too. Costco or Trader Joe's usually have great deals on family packs. Look for thighs with good marbling for extra flavor. If you can't find bone-in, skin-on, don't stress—just season well and cook slowly. The carrots should be bright orange, not woody or shriveled. Local farmers markets often have the freshest veggies, but the grocery store works fine. For the puff pastry, Pepperidge Farm is my go-to—it's foolproof for beginners, but feel free to use your favorite brand.
No heavy cream? Half-and-half works in a pinch, though it won't be as rich. Short on chicken broth? Vegetable broth with a splash of soy sauce adds depth. Fresh thyme is ideal, but dried works at one-third the amount. The flour for the roux needs to be all-purpose—bread flour makes it gummy. For the pastry, if you can't find puff pastry, homemade pie crust is a great alternative (just make sure it's sturdy enough for the filling). The garlic can be pre-minced from a jar, but fresh has way more flavor—worth the extra minute.
This pie reheats beautifully—just cover with foil and warm in the oven. Keeps for 3-4 days in the fridge, freezes for up to 3 months. I always make a double batch because leftovers are just as good. Store the filling separately from the crust before baking—assemble fresh for the best texture. The crust stays crispy for about 2 days if you keep it wrapped in parchment.
Why You'll Love This Recipe
- One-Pot Wonder: I swear by this recipe because it’s basically set it and forget it—just brown the chicken, toss in the onions and carrots, add the peas, and let the broth do its magic. No chopping mountains of veggies or juggling multiple pans; it’s all in one deep dish.
- Rich, Layered Comfort: That mix of juicy chicken thighs and breasts gives it depth—tender, not dry—and the onions caramelize just enough to make every bite taste like a hug. The peas add a bright pop, but honestly? The creamy, savory filling is the real star.
- Leftovers That Don’t Suck: Between us, most pot pies turn into sad, soggy leftovers. Not this one. The thick crust keeps it sturdy, and the filling reheats like it’s fresh. I make it on Sundays and still have seconds three days later—no one complains.
- Budget-Friendly Crowd-Pleaser: Chicken thighs stretch further than breasts, and frozen peas cut costs without sacrificing flavor. It feeds six for under $15, and my picky-eater nephew actually finishes his portion. That’s a win.
Step-by-step instructions for big chicken pot pie
Here's how to build a showstopping pot pie with layers of tender chicken, rich gravy, and golden puff pastry.
Sear the Chicken for Maximum Flavor
Pat the 1.5 lb chicken thighs and 1.5 lb chicken breasts dry with paper towels. Heat a large oven-safe skillet over medium-high heat and add 0.25 cup of the 0.75 cup unsalted butter (save the rest for later). Working in batches, add the chicken pieces skin-side down and cook for 4-5 minutes until golden brown and crispy.
Flip the chicken and cook for another 3-4 minutes until the internal temperature reaches 165°F. Transfer the cooked chicken to a plate and set aside. You'll notice the skin on the thighs becomes beautifully crisp while the breasts stay juicy—this is your flavor foundation. Keep the browned bits in the skillet; they'll form the base of your gravy.
Build the Savory Filling
In the same skillet, reduce heat to medium and add 2 whole yellow onions and 4 cloves minced garlic. Cook for 5 minutes until the onions soften and turn translucent. Add 1.5 lb sliced carrots and cook for another 5 minutes until they begin to caramelize slightly.
Stir in the 0.25 cup fresh thyme and 0.5 tsp ground black pepper, then pour in the 2 cups chicken broth. Bring to a simmer and let it reduce by about half—this concentrates the flavors. Return the chicken to the skillet along with the 1.5 cups thawed frozen peas and 1.5 tsp salt. Simmer for 5 minutes to let everything meld together.
Create the Creamy Gravy
Remove the skillet from heat and let it cool slightly. In a separate bowl, whisk together the 0.5 cup all-purpose flour and remaining 0.5 cup unsalted butter until crumbly. Gradually whisk in the 1 cup heavy cream until smooth. Slowly pour this mixture back into the skillet with the chicken filling, stirring constantly.
Return to medium-low heat and cook for 3-4 minutes until the gravy thickens enough to coat the back of a spoon. The mixture should look velvety and slightly glossy. Taste and adjust seasoning if needed—this is your chance to perfect the balance of flavors before it goes under the crust.
Assemble the Pot Pie
Preheat your oven to 375°F. Transfer the chicken filling to a 9x13-inch baking dish and spread it evenly. Unfold the 1 sheet puff pastry and place it over the filling. Use a sharp knife to cut the pastry into strips, leaving some space between them for the lattice design. Fold every other strip back to create the classic crisscross pattern.
Brush the pastry with the beaten egg and sprinkle with a pinch of salt. Bake for 30-35 minutes until the pastry is golden brown and puffed. The edges should look crisp while the center remains slightly soft—this indicates perfect doneness. Let it rest for 10 minutes before serving to allow the filling to set.
Serve Warm and Enjoy
Slice through the lattice pattern to reveal the steaming filling beneath. The contrast of the crisp, flaky pastry with the tender chicken and creamy gravy is what makes this pot pie extraordinary. Serve with a simple green salad or crusty bread to soak up every last bit of that rich sauce.
Here's the thing—this dish tastes even better the next day when the flavors have fully melded. The secret to that perfect flaky crust? Don't skip the egg wash or the proper resting time. Trust me, your taste buds will thank you.
Pro Tips For Making Big Chicken Pot Pie
- Brown the Chicken First: Skip the raw chicken in the pot pie filling—it’ll turn your gravy into soup. Sear thighs and breasts in batches with oil until golden (about 5-6 minutes per side), then remove. This locks in flavor and keeps the filling thick, not watery. (Yes, it takes 10 extra minutes, but the difference is worth it.)
- Cut Chicken Small: Big chunks of chicken breast stay rubbery. After searing, slice breasts into ½-inch pieces; thighs can stay in 1-inch chunks. Smaller pieces cook faster and blend better into the filling—no one wants to bite into a chewy surprise. (I used to skip this, and it was a mistake.)
- Don’t Overcook the Peas: Frozen peas add texture, not mush. Toss them in at the very end—just 2-3 minutes with the veggies—so they stay bright green and crisp. Overcooking turns them into sad, gray mush, and no one wants that. (Trust me, I’ve served it both ways.)
- Use a Splatter Screen: Onions release like a firework when they hit the pan. Place a fine-mesh screen or lid over the pot while sautéing to catch the spray—your stovetop and ceiling will thank you. (I learned this after scrubbing grease off my cabinets for the third time.)
Make-ahead tips for this recipe
Prep Ahead Strategy
Assemble the filling up to 2 days ahead and refrigerate it covered in the baking dish. The flavors deepen beautifully when chilled. Reheat the filling gently in a skillet before adding the pastry to prevent sogginess. I always prep mine the night before—just pop it in the oven the next day for a stress-free dinner. 📅
Freezer-Friendly Filling
For longer storage, freeze the filling in a freezer-safe container for up to 3 months. Thaw overnight in the fridge before baking. The texture remains perfect—just add fresh pastry after thawing. I double the batch and freeze half for lazy weeknights. 🥶
Crust Assembly Tips
Roll out the puff pastry and cut the lattice pattern up to 4 hours ahead. Wrap it tightly in plastic wrap and refrigerate. This prevents it from drying out. Brush with egg wash right before baking for maximum crispiness. I keep pre-cut pastry strips ready in my fridge for quick assembly. ✨
Make-Ahead Baking
Bake the assembled pot pie up to 2 days ahead and store it at room temperature. Reheat in a 350°F oven for 15-20 minutes covered with foil to refresh the crust. The filling stays warm and the pastry regains its crisp texture. Perfect for meal prep Sundays! 🍽️
Leftovers Magic
Store leftovers in an airtight container for up to 4 days. Reheat individual portions in the microwave for 1-2 minutes covered with a damp paper towel. The crust stays crispy if you reheat it covered, then uncover for the last 30 seconds. I always save leftovers for sandwiches the next day. 💫
Nutrition facts
Frequently asked questions
Can I use chicken breasts only instead of thighs?
Yes, but thighs add more flavor and moisture! Use 3 lbs boneless, skinless breasts instead of the mixed recipe to keep the same quantity. Cook them 2-3 minutes less per side to avoid drying out, and add 1/4 cup extra chicken broth to compensate for their lower fat content.
What if I don't have puff pastry?
No problem! A homemade pie crust works beautifully—just make it sturdy enough to hold the filling. Roll it out to 1/8-inch thickness and cut slits for steam to escape. For a shortcut, use store-bought pie crust and press it gently over the filling before baking. The texture will be slightly different but still delicious.
How do I make this pot pie gluten-free?
Swap the puff pastry for a gluten-free pie crust or use a gluten-free puff pastry alternative like the one from King Arthur. For the gravy, replace all-purpose flour with 1/4 cup cornstarch or gluten-free flour blend mixed with 1/4 cup butter. Test the crust first—some brands need extra support for heavy fillings.
Why did my crust turn soggy?
Soggy crust usually means the filling was too wet or the pastry wasn't pre-baked. To fix it: Chill the filling for 30 minutes before adding the crust, and pre-bake the pastry strips for 5 minutes at 375°F before adding the filling. Also, ensure your baking dish isn't too large—this recipe works best in a 9x13-inch pan.
Can I add other vegetables?
Try green beans, mushrooms, or corn for extra texture. Add them with the peas at the end and cook for 2-3 minutes to warm through. For heartier veggies like potatoes, par-cook them first. Just adjust the salt and pepper to balance the new flavors.