
Main Courses
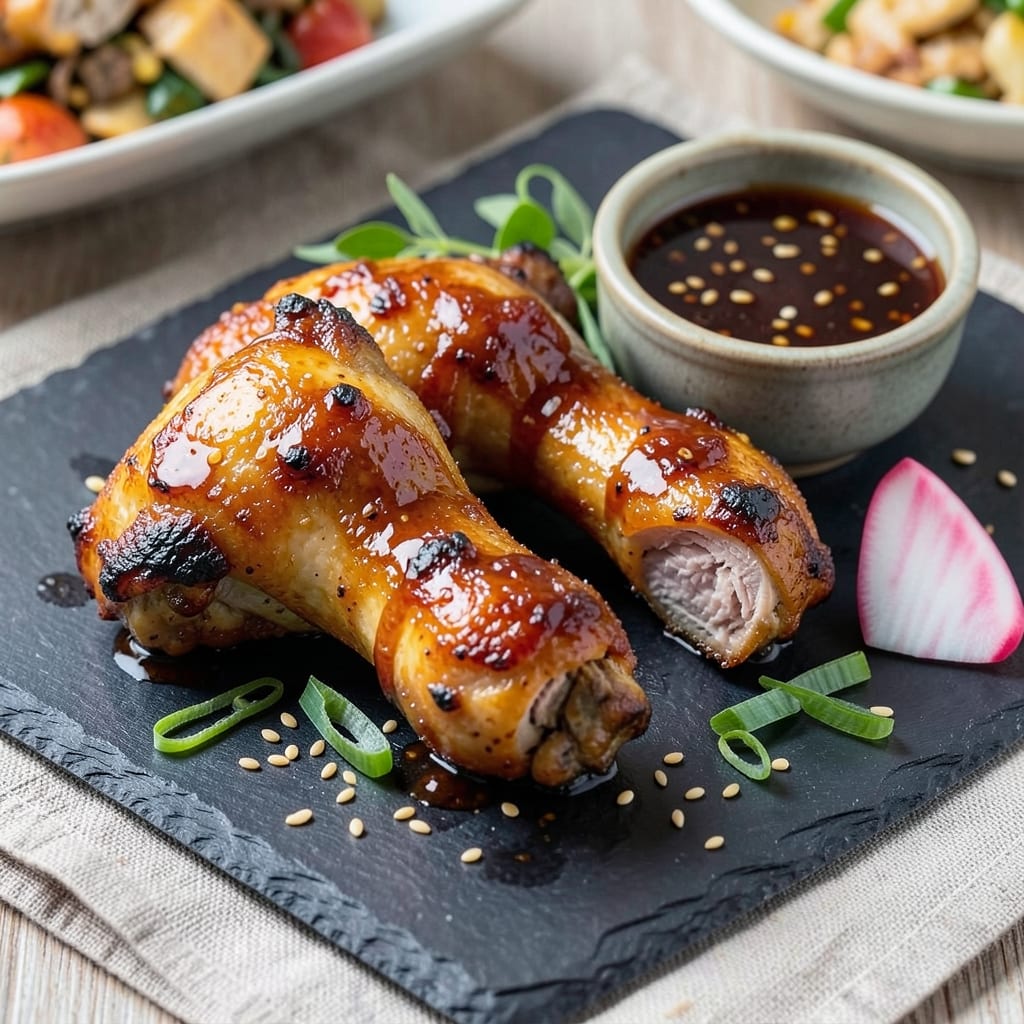
This baked teriyaki chicken legs recipe delivers restaurant-quality flavor with minimal effort—juicy, tender meat wrapped in a glossy, caramelized crust that's impossible to resist. 🌟 The secret lies in marinating overnight and finishing with a quick broil to intensify those sweet-savory notes. I developed this after years of struggling with dry chicken legs, and this method guarantees perfect results every time.
What sets this recipe apart is the balance of traditional techniques with modern convenience. While the marinade builds deep flavor, the baking process creates that coveted caramelized crust without requiring constant oven attention. The sticky-sweet sauce clings to the chicken, creating a mouthwatering glaze that's both elegant and satisfying. It's the kind of dish that transforms a simple weeknight into something special.
By the time these golden-brown chicken legs emerge from the oven, you'll have a main course that's ready to serve with minimal cleanup. The meat stays moist and flavorful, while the sauce achieves that perfect balance of sweetness and umami. This recipe scales beautifully for families or gatherings, and the leftovers reheat wonderfully for lunch the next day.
Pair with steamed jasmine rice and stir-fried vegetables for a complete meal that feels restaurant-worthy. The best part? This method works equally well in conventional ovens or air fryers, giving you flexibility for any kitchen setup. Let's get started on creating these irresistible chicken legs.
Ingredients for baked teriyaki chicken legs
Juicy chicken legs meet sticky-sweet teriyaki magic—just 13 ingredients for restaurant-worthy flavor.
| Ingredient | Amount | Notes |
|---|---|---|
| Chicken Legs (Thigh-Drumstick) 🍗 | 1 ½ lb | Bone-in, skin-on preferred |
| Teriyaki Sauce 🍶 | ¾ cup | Store-bought or homemade |
| Honey 🍯 | 2 tbsp | For extra glossy glaze |
| Soy Sauce 🥢 | 2 tbsp | Low-sodium preferred |
| Garlic Cloves 🧄 | 4 cloves | Minced for marinade |
| Fresh Ginger 🌿 | 1 tbsp | Grated, for aromatic depth |
| Sesame Oil 🫒 | 1 tbsp | Toasted sesame flavor |
| Olive Oil 🫒 | 1 tbsp | For even coating |
| Brown Sugar 🍚 | 2 tbsp | Enhances caramelization |
| Diamond Crystal Kosher Salt 🧂 | 1 tsp | For seasoning |
| Ground Black Pepper 🌶️ | ½ tsp | Freshly cracked |
| Cornstarch 🌾 | 1 tbsp | For thicker glaze |
| Green Onion 🧅 | 2 whole | Sliced, for garnish |
The chicken legs are the star here, so bone-in, skin-on gives you that crispy skin and juicy meat. Grab them from the butcher counter if possible—they'll be fresher than the pre-packaged ones. Look for even-sized pieces around 8-10 oz each for consistent cooking. The skin should be pale yellow, not grayish, and the meat should feel firm to the touch. Trader Joe's or Whole Foods often have great quality, but your local grocery store's fresh case works too. If you can't find bone-in, use boneless thighs instead, but they won't be as juicy.
No teriyaki sauce? Mix 3 tbsp soy sauce, 2 tbsp honey, 1 tbsp brown sugar, and 1 tsp grated ginger for a quick version. The honey adds that glossy finish, so don't skip it—agave nectar works in a pinch. Fresh ginger is ideal, but 1 tsp ground ginger at half the amount gets you close. For extra umami, add a splash of fish sauce (if not vegetarian) or an extra tbsp of soy sauce. The cornstarch is key for that thick, caramelized glaze—arrowroot powder works too—just make sure to mix it with a little cold water first to avoid clumping.
Marinate the chicken overnight for maximum flavor, but at least 4 hours if you're short on time. The sauce keeps well in the fridge for 1 week or freezer for 3 months. Leftovers reheat beautifully—just cover with foil and warm in the oven at 350°F for 10-15 minutes. For extra crispy skin, broil for 2-3 minutes at the end. These reheat even better the next day as the flavors meld—perfect for meal prep!
Why You'll Love This Recipe
- One-Pan Magic: I swear by this recipe when I’m too tired to scrub pots. Toss the chicken legs and sauce on a sheet pan, pop it in the oven, and walk away—no stovetop babysitting or sticky messes. The garlic cloves roast right on the tray, infusing everything as they soften, so you get that deep, caramelized aroma without extra effort.
- Sweet-Savory Crunch: That crispy skin? Pure reward. The honey and soy sauce blend creates a sticky, glossy glaze that caramelizes into little shards of flavor, while the garlic adds a punchy kick that cuts through the richness. Honestly, the first bite makes me forget I was planning to order takeout.
- Meal Prep MVP: Between us, this is my go-to for lunch boxes and potlucks. The baked legs stay juicy for days—just reheat in the oven or microwave—and the sauce clings so well, it’s like they’re fresh out of the oven. My kids grab them straight from the fridge for school, and they’re still begging for seconds.
- Budget-Friendly Feast: Chicken thighs are cheaper than breasts, and this recipe stretches further than you’d think. A few legs feed four, with leftovers that taste just as good the next day. I’ll be real: I’ve made this with store-brand teriyaki sauce and still ended up with ridiculously good results—proof that fancy labels aren’t always necessary.
Step-by-step instructions for glazed caramelized chicken legs
Here's how to create restaurant-quality teriyaki chicken with crispy skin and a sticky-sweet glaze.
👨🍳 Step 1: Create the Glazing Marinade
In a medium bowl, whisk together the 0.75 cup teriyaki sauce, 2 tbsp honey, 2 tbsp soy sauce, 2 tbsp brown sugar, 1 tbsp sesame oil, and 1 tbsp olive oil. This combination creates the perfect balance of sweet and savory flavors that will caramelize beautifully during baking. Add the 4 cloves minced garlic and 1 tbsp grated fresh ginger to the mixture, stirring well to incorporate their aromatic punch.
Season the marinade with 1 tsp Diamond Crystal kosher salt and 0.5 tsp freshly cracked black pepper. The salt enhances the natural flavors of the chicken while the pepper adds a subtle heat that complements the sweet glaze. Give it one final stir to ensure all ingredients are evenly distributed throughout the marinade.
🍳 Step 2: Coat and Rest the Chicken
Pat the 1.5 lb chicken legs dry with paper towels—this is crucial for achieving crispy skin. The drier the chicken, the better the caramelization. Place the chicken legs in a large resealable plastic bag and pour the marinade over them, making sure each piece is thoroughly coated. Here's the thing—don't just pour the marinade over the chicken and call it good. Seal the bag and gently massage the chicken for about 30 seconds to ensure the marinade penetrates the meat and adheres to the skin.
Let the chicken marinate in the refrigerator for at least 30 minutes, but I recommend 1-2 hours for maximum flavor infusion. This resting period allows the chicken to absorb the marinade, which not only enhances flavor but also helps prevent the skin from drying out during baking. If you're short on time, even 15 minutes will make a noticeable difference.
🔥 Step 3: Preheat and Bake for Crispy Skin
Preheat your oven to 425°F—this high temperature is key for achieving that beautiful caramelized crust. While the oven heats, remove the chicken from the refrigerator and let it sit at room temperature for 10 minutes. This ensures even cooking throughout. Line a baking sheet with aluminum foil for easy cleanup, then place the chicken legs skin-side up on the prepared sheet.
Bake the chicken for 30 minutes, flipping the legs halfway through the cooking time to ensure even browning. You'll know it's time to flip when you see the skin starting to crisp and turn golden brown. Don't be tempted to open the oven door to check earlier—every time you open it, you lose heat and extend the cooking time. The chicken is done when the skin is deep golden brown and crispy, and the internal temperature reaches 165°F in the thickest part of the thigh.
🥘 Step 4: Thicken the Glaze and Finish Cooking
While the chicken bakes, prepare the glaze by combining the 1 tbsp cornstarch with 2 tablespoons of water in a small bowl. Whisk until smooth, then transfer to a small saucepan. Place the saucepan over medium heat and add the pan drippings from the baking sheet—these are packed with flavor. Bring to a gentle simmer, stirring constantly, until the glaze thickens to a glossy consistency, about 3-4 minutes. This step is crucial for creating that signature sticky-sweet sauce that clings beautifully to the chicken.
Once the chicken is fully cooked, remove it from the oven and transfer it to a serving platter. Spoon the thickened glaze evenly over the chicken legs, making sure each piece is generously coated. Return the chicken to the oven for 5-7 minutes to allow the glaze to set and caramelize further. This final step ensures the sauce is perfectly balanced—sweet, sticky, and slightly caramelized.
🍽️ Step 5: Garnish and Serve Immediately
Remove the chicken from the oven and let it rest for 5 minutes before serving. This brief resting period allows the juices to redistribute, ensuring each bite is moist and flavorful. While the chicken rests, slice the 2 whole green onions into thin rounds and sprinkle them over the top of the chicken legs for a fresh, vibrant garnish that adds a subtle onion bite to each bite.
Serve the glazed teriyaki chicken legs immediately, drizzled with any remaining sauce from the platter. The contrast of crispy skin, tender meat, and sticky-sweet glaze makes every bite unforgettable. Pair with steamed jasmine rice and a simple side salad for a complete meal that's sure to impress.
Pro Tips For Making Baked Teriyaki Chicken Legs
- Preheat Like It’s 1999: Your oven should hit 425°F (220°C) and stay there—no preheating shortcuts. I learned this the hard way: skipping it means the sauce pools instead of caramelizing, and your legs steam instead of crisping. Trust me, the first 15 minutes at this heat are non-negotiable for that sticky, golden crust.
- Trim the Fat, Not the Flavor: Pat those chicken legs bone-dry with paper towels, but leave the skin intact—it’s your crispy insurance. I used to peel off the fat, thinking it was "healthier," but now I just blot it carefully. The fat renders down into flavor gold when baked, so work with it, not against it.
- Sauce in Stages: Don’t drown them—brush half the teriyaki on raw, then flip and add the rest after 20 minutes. The first coat caramelizes into a glaze, while the second keeps it glossy. (Yes, even if you’re impatient like me, resist the urge to smother them early.)
- Garlic Hack for Lazy People: Mince the garlic fine (or use a food processor for 2 seconds) and mix it straight into the teriyaki sauce before baking. No chopping mid-recipe, no burning garlic on the skin—just even distribution. My grandmother swore by this, and she was right: it’s foolproof.
Creative variations of this baked teriyaki chicken legs
Spicy Teriyaki Kick
Add 1 tbsp sriracha or 1 tsp gochujang to the marinade for a fiery twist that balances the sweetness. I like to mix it with the teriyaki sauce before coating the chicken—this ensures even heat distribution. For extra heat lovers, sprinkle ½ tsp red pepper flakes on top after baking. 🌶️
If you prefer a smoky heat, swap the sriracha for 1 tbsp gochugaru (Korean chili flakes)> and add ½ tsp smoked paprika to the marinade. The result is a complex flavor that’s both spicy and aromatic—perfect for those who love depth in their heat.
Honey-Glazed Option
For a sweeter profile, increase the honey to 3 tbsp and reduce the brown sugar to 1 tbsp. This creates a glossier, more fluid glaze that drizzles beautifully over the chicken. I often add 1 tsp vanilla extract to the marinade for a subtle floral note that pairs wonderfully with the honey. 🍯
Pair this variation with a sprinkle of toasted sesame seeds before serving for added texture and nutty depth. The extra honey also makes this version ideal for serving with cucumber salad or steamed bok choy to cut through the richness.
Umami Boost
For a deeper savory flavor, stir 1 tbsp fish sauce (or 1 tsp miso paste for vegetarian) into the marinade. This adds a rich, fermented depth that elevates the teriyaki profile. I also like to add 1 tsp toasted sesame oil to the glaze before finishing in the oven for an extra layer of complexity. 🥢
This variation works exceptionally well with steamed jasmine rice> and a side of quick-pickled vegetables. The umami boost makes it feel like a restaurant-quality dish without the fuss.
Air Fryer Adaptation
For a quicker cook, use an air fryer at 375°F for 20 minutes, flipping halfway. The air fryer creates a crispy skin without needing to broil, and the marinade caramelizes beautifully. I recommend spraying the chicken with 1 tsp olive oil before air frying to ensure even browning. 🔥
Finish by brushing the chicken with a mix of 2 tbsp teriyaki sauce> and 1 tbsp honey after air frying, then air fry for an additional 2-3 minutes> to set the glaze. This method cuts cooking time in half while keeping all the flavor.
Asian-Inspired Fusion
Swap the teriyaki sauce for ½ cup hoisin sauce> and add 1 tbsp rice vinegar> and 1 tsp five-spice powder to the marinade. This fusion creates a tangy, aromatic glaze that’s inspired by Chinese and Southeast Asian flavors. The five-spice adds warmth and complexity that pairs beautifully with the chicken. 🌏
Garnish with crushed peanuts> and cilantro leaves> for a dish that feels fresh yet deeply flavorful. Serve with steamed egg rolls> or coconut rice**> for a complete fusion meal.
Nutrition facts
Frequently asked questions
Can I use chicken thighs instead of legs?
Bone-in, skin-on thighs work perfectly—they'll cook faster than legs and stay just as juicy. For even cooking, use 6-8 oz thighs (about 2 pieces) instead of 1.5 lb legs. Reduce baking time to 20-25 minutes total, flipping halfway. The skin will crisp beautifully with the same method.
How do I prevent the chicken from drying out?
Marinating overnight is key, but the real secret is not overcooking. Use a meat thermometer—chicken is done at 165°F in the thickest part. For extra moisture, add 1 tbsp water or chicken broth to the marinade. Baking at 425°F ensures crispy skin while keeping the meat tender inside.
Can I make this recipe ahead of time?
Yes! Cook the chicken up to 2 days ahead and store it in the fridge. Reheat covered at 350°F for 15-20 minutes until warmed through. The flavors actually improve overnight as the sauce melds. For make-ahead prep, marinate the chicken the night before and bake fresh the next day.
What's the best way to thicken the sauce?
Cornstarch is foolproof, but you can also use 1 tbsp arrowroot powder or 1 tsp xanthan gum. For a quick fix, whisk 1 tbsp butter into the pan drippings while thickening—this adds richness. If your sauce is too thin, simmer uncovered for 1-2 extra minutes to evaporate excess liquid.
How do I make this gluten-free?
Use gluten-free tamari instead of soy sauce and check your teriyaki sauce label. For homemade, swap soy sauce with ½ cup coconut aminos plus 1 tbsp rice vinegar. The flavor stays rich and savory—just ensure all ingredients are certified gluten-free to avoid cross-contamination.