
Sauces & Condiments
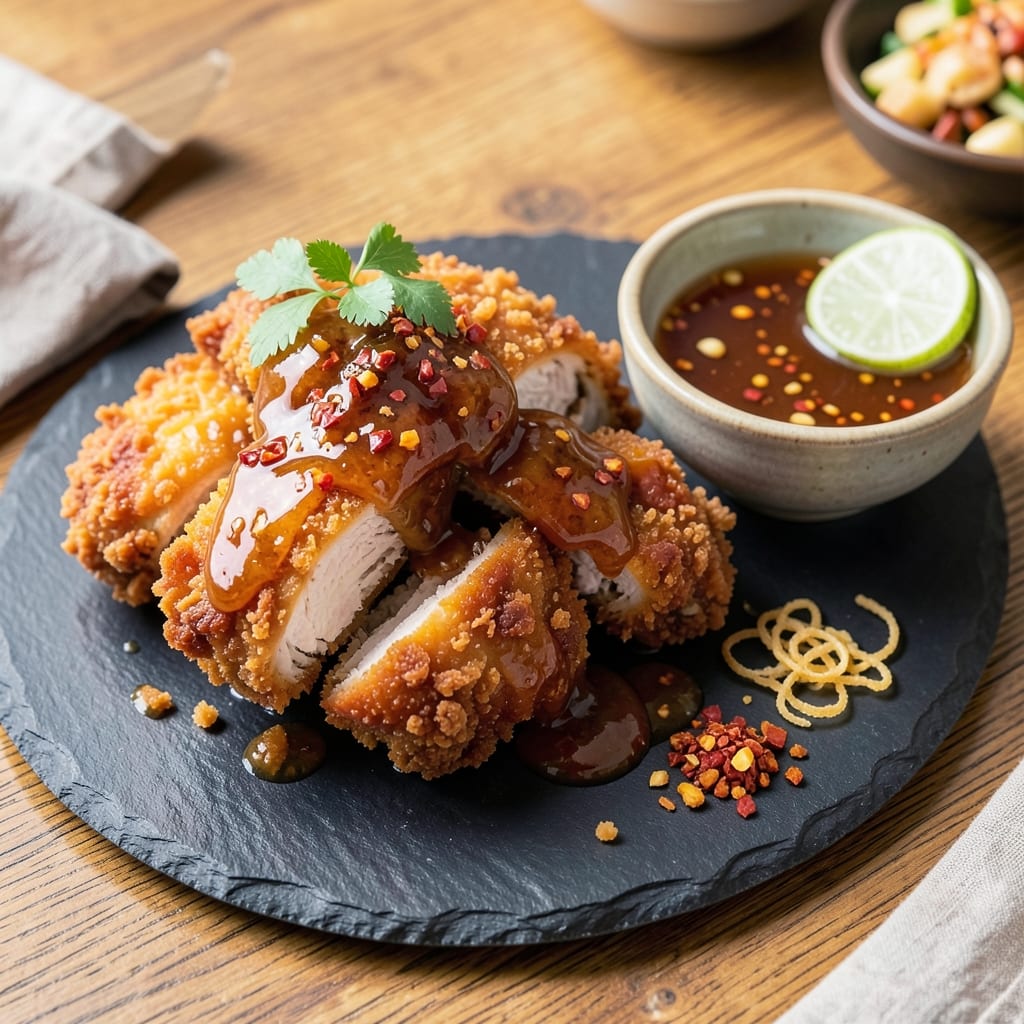
This Asian fried chicken sauce transforms crispy bites into irresistible bites with its perfect balance of sweet, spicy, and umami flavors. 🔥 The secret lies in simmering soy sauce, honey, garlic, and chili into a glossy, sticky sauce that clings beautifully to golden, crispy chicken. I developed this recipe after years of experimenting with restaurant-style sauces, and it never fails to impress.
The foundation of this sauce is a simple but powerful combination of ingredients that work together to create depth and complexity. Soy sauce provides the salty umami base, while honey adds just the right amount of sweetness to balance the heat from chili flakes. Fresh garlic and ginger infuse the sauce with aromatic warmth, ensuring every bite is packed with flavor.
What makes this sauce truly special is its versatility—it works as both a dipping sauce and a glaze. When used as a glaze, it caramelizes slightly during cooking, creating a glossy finish that enhances the crispy texture of the chicken. The sauce is also incredibly easy to adjust; simply add more honey for sweetness, extra chili for heat, or a splash of rice vinegar for brightness.
Whether you're serving up crispy fried chicken for a casual gathering or meal prepping for the week, this sauce will elevate your dish to restaurant-quality. The best part? It takes just 15 minutes to make and keeps well in the fridge for up to two weeks, so you can enjoy it whenever the craving strikes.
Ingredients for asian fried chicken sauce
Sweet, spicy, and umami—this sauce needs just 10 simple ingredients for restaurant-quality flavor.
| Ingredient | Amount | Notes |
|---|---|---|
| Soy Sauce 🍶 | ½ cup | Light or dark variety preferred |
| Honey 🍯 | ⅓ cup | Wildflower or clover preferred |
| Garlic Cloves 🧄 | 4 cloves | Freshly minced for best flavor |
| Ginger Root 🌿 | 1 tbsp | Freshly grated, not powdered |
| Red Chili Flakes 🌶️ | 1 tbsp | Adjust for desired heat level |
| Rice Vinegar 🍶 | 1 tbsp | Seasoned preferred for brightness |
| Sesame Oil 🫒 | 1 tbsp | Toasted sesame oil for aroma |
| Cornstarch 🌾 | 1 tsp | For thickening consistency |
| Water 💧 | 1 tbsp | For cornstarch slurry |
| Salt 🧂 | ½ tsp | Kosher or sea salt preferred |
The soy sauce is your flavor anchor—Kikkoman or Lee Kum Kee are my go-tos, but any good-quality brand works. Honey should be real stuff (none of that ultra-processed syrup)—Manuka or wildflower adds subtle depth. Fresh ginger and garlic are non-negotiable here; the powdered versions just won't give that same aromatic punch. For chili flakes, Trader Joe's has great options, but any crushed red pepper works. Pro tip: Toast your sesame oil in the saucepan for 10 seconds before adding other ingredients—it releases those nutty aromas.
No honey? Maple syrup or agave nectar work in a pinch (use same amount). Running low on rice vinegar? Apple cider vinegar gives similar tang. The cornstarch slurry is key for that glossy finish—mix it well with cold water before adding to the sauce. Too thick? Thin with a splash of water. Too thin? Simmer longer. Want more umami? Add 1 tsp of miso paste at the end. For extra heat, swap chili flakes for fresh chili paste (reduce amount by half).
This sauce tastes even better the next day as flavors meld. Keeps for 2 weeks in the fridge, sealed tightly. For meal prep, make a double batch and freeze half in ice cube trays—perfect for quick glaze additions later. If storing for longer than a week, add a thin layer of oil on top to prevent mold. Trust me, this sauce is worth every minute of simmering time—it's the secret weapon behind those crispy, sticky bites.
Why You'll Love This Recipe
- I’ll be real: this sauce uses stuff you probably already have. Soy sauce, honey, a couple of garlic cloves—no specialty shopping required. Honestly, I’ve made it three times this month because it’s that reliable.
- Pantry Magic: I’ll be real: this sauce uses stuff you probably already have. Soy sauce, honey, a couple of garlic cloves—no specialty shopping required. Honestly, I’ve made it three times this month because it’s that reliable.
- Sweet Heat Balance: That honey and chili combo? Chef’s kiss. The garlic and ginger add depth, but the red chili flakes bring just enough kick to wake up every bite. Not too sweet, not too spicy—just right, like a perfect first date.
- Game for Any Meal: Slather it on fried chicken, toss it with noodles, or drizzle it over rice bowls. I’ve even used it as a quick marinade for tofu when I’m lazy. It’s the kind of sauce that turns ordinary dinners into something special without trying too hard.
Step-by-step instructions for sweet-chili umami sauce
Here's how to whip up this addictive sauce that'll make your crispy bites shine.
🍳 Step 1: Bloom the Aromatics in Toasted Sesame Oil
Heat a small saucepan over medium-low heat and add the 1 tablespoon sesame oil. Let it warm for 30 seconds until fragrant—you'll smell that nutty, toasty aroma we're after. Add the 4 cloves minced garlic and 1 tablespoon grated ginger root, stirring constantly for 1 minute until the garlic turns golden and the ginger becomes translucent.
This is where the magic happens—the garlic shouldn't burn, just develop that nutty aroma. If it starts to darken too quickly, reduce heat immediately. Here's the thing—properly blooming these aromatics builds the sauce's depth of flavor. Don't rush this step, or you'll miss out on that umami punch that makes this sauce special.
🍳 Step 2: Combine Wet Ingredients and Simmer
Pour in the 0.5 cup soy sauce, 0.33 cup honey, 1 tablespoon rice vinegar, 1 tablespoon red chili flakes, and 0.5 teaspoon salt. Stir well to combine, then bring the mixture to a gentle boil over medium heat. Once boiling, reduce heat to low and let it simmer uncovered for 5-6 minutes until slightly thickened.
You'll see the sauce reduce and darken slightly—this is normal and actually enhances the flavor. The honey will help balance the saltiness while adding that perfect sweetness. I know it seems like a lot of honey, but trust me, it's the secret to that perfect sweet-chili balance. Stir occasionally to prevent sticking, but don't over-stir or you'll create bubbles that make the sauce foam.
🥘 Step 3: Thicken with Cornstarch Slurry
In a small bowl, whisk together the 1 teaspoon cornstarch and 1 tablespoon water until completely dissolved. This creates your thickening agent. Pour this slurry into the simmering sauce while stirring constantly for 1-2 minutes until the sauce reaches your desired consistency—it should coat the back of a spoon but still be pourable.
Here's where it gets tricky: if the sauce thickens too much, add 1 teaspoon water at a time until it reaches that perfect drizzle consistency. If it's too thin, you can simmer it longer but don't add more cornstarch—it'll make the sauce grainy. The sauce should be glossy with a smooth texture, ready to cling beautifully to crispy chicken.
⏰ Step 4: Cool and Adjust Seasoning
Remove the sauce from heat and let it cool for 5 minutes. Taste and adjust seasoning if needed—add a pinch more salt if it tastes flat, or a bit more honey if the chili heat is too strong. The sauce will thicken slightly more as it cools, so don't worry if it looks perfect now but seems too thick later.
I like to give it a final taste test before using—this sauce should sing with sweet, tangy, umami, and just a hint of heat. If you're serving immediately, you can use it straight from the pan. For best results, let it cool completely and store in an airtight container in the fridge for up to 1 week. The flavors actually deepen as it sits!
Pro Tips For Making Asian Fried Chicken Sauce
- Simmer Low and Slow: I learned this the hard way—boiling the sauce too hard makes it bitter fast. Keep the heat at a gentle simmer (tiny bubbles, not rolling) and let it reduce for 10-12 minutes. The honey and soy sauce will thicken properly without burning, and the garlic won’t turn to paste.
- Mince Ginger Like You Mean It: Skip the food processor for ginger—it turns to mush. Use a sharp knife and chop it into a fine paste (almost like wet sand) before adding it to the pan. This releases the flavor evenly instead of settling in clumps at the bottom.
- Balance the Chili Early: Toss in half the red chili flakes first, taste after 2 minutes, then add the rest. If you dump it all in at once, you’ll either need to adjust with extra honey or end up with a mouthful of heat that won’t balance out.
- Deglaze with Warm Water: After cooking the garlic and ginger, splash in ¼ cup warm water (not cold) to lift the browned bits. Cold water shocks the pan and makes cleanup harder—warm water loosens the flavor bombs stuck to the bottom.
Make-ahead tips for this asian fried chicken sauce
Sauce Prep Ahead
Make this sauce 24 hours in advance for maximum flavor development. The ingredients meld beautifully overnight, creating deeper umami and balanced sweetness. Store in an airtight container in the fridge—it keeps for 2 weeks without losing quality. I like to make a double batch on Sundays so I always have sauce ready for quick weeknight meals. 💫
Freezer-Friendly
Freeze sauce in ice cube trays for portion control—each cube equals about 1 tablespoon of sauce. Once frozen, transfer cubes to a ziplock bag and flatten to save space. Thaw overnight in the fridge or microwave for 20 seconds before using. The texture remains perfect for glazing or dipping. Pro tip: Add a thin layer of oil on top before freezing to prevent freezer burn.
Chicken Prep Tips
Marinate your chicken in ½ cup sauce for 1-2 hours before frying for extra flavor infusion. Use a ziplock bag for easy mixing. For meal prep, fry chicken in batches and store in the fridge for 3 days—toss with 2 tbsp fresh sauce when reheating. The sauce reheats beautifully, so no need to make it fresh every time. 🍗
Sauce Storage Hacks
Keep sauce in small jars for easy grab-and-go dipping. A 4-ounce jar is perfect for individual servings. Label with the date—sauce tastes best within 1 week of making. If you notice separation, just stir gently before using. For extra freshness, store in the door shelf of your fridge where temperatures are more stable. This sauce is too good to waste!
Batch Cooking
Double the recipe and store half in the freezer for up to 3 months. Use a quart-sized freezer bag for easy storage. When ready to use, thaw in the fridge overnight. The sauce maintains its glossy texture perfectly after freezing. I always keep a backup batch in my freezer—you never know when you'll crave crispy, saucy chicken! ❄️
Reheating Sauce
Reheat sauce in a small saucepan over low heat for 2-3 minutes, stirring constantly. Avoid microwaving—it can make the sauce grainy. If the sauce thickens too much, add 1 teaspoon water at a time until it reaches a smooth, pourable consistency. The sauce reheats beautifully and tastes even better the second time around. Perfect for leftovers!
Nutrition facts
Frequently asked questions
Can I make this sauce without honey?
Yes! For a vegan version, substitute ⅓ cup maple syrup or agave nectar for the honey. The sauce will still have that sweet-chili balance, though honey adds a unique depth that's hard to replicate. If you're avoiding sugar entirely, try 1 tbsp brown sugar mixed with 2 tbsp water—simmer until dissolved before adding to the sauce.
How spicy should this sauce be?
The recipe uses 1 tbsp red chili flakes for a mild but noticeable heat. For extra kick, add ½ tsp chili paste (like sambal oelek) or 1 fresh Thai chili, finely minced. Remember: chili flakes burn off when simmered, so taste before adjusting. If you love heat, add chili at the end instead of during cooking to preserve its intensity.
Can I use this sauce on other foods besides chicken?
This sauce works beautifully on tofu, pork ribs, or even fries—its sticky texture clings to anything crispy. Try brushing it on grilled shrimp or drizzling over steamed dumplings for an instant flavor boost. The sweet-savory balance makes it versatile for both Asian-inspired dishes and fusion creations.
Why did my sauce turn out too thick?
Over-simmering or adding too much cornstarch causes thickening. To fix it, whisk in 1 tsp water at a time until smooth. If the sauce is too thick during cooking, reduce heat and stir in 1 tbsp water while simmering. For future batches, simmer only 4-5 minutes and taste before adding cornstarch—sometimes the sauce thickens enough on its own!
How can I make this sauce extra umami?
Boost umami by adding 1 tsp miso paste or ½ tsp fish sauce at the end of cooking. For a deeper flavor, replace 2 tbsp soy sauce with 1 tbsp dark soy sauce (it's richer and sweeter). Another trick: Add 1 tsp dried shiitake powder or a splash of oyster sauce**—both add incredible depth without overpowering the sweet-spicy balance.