
Main Courses
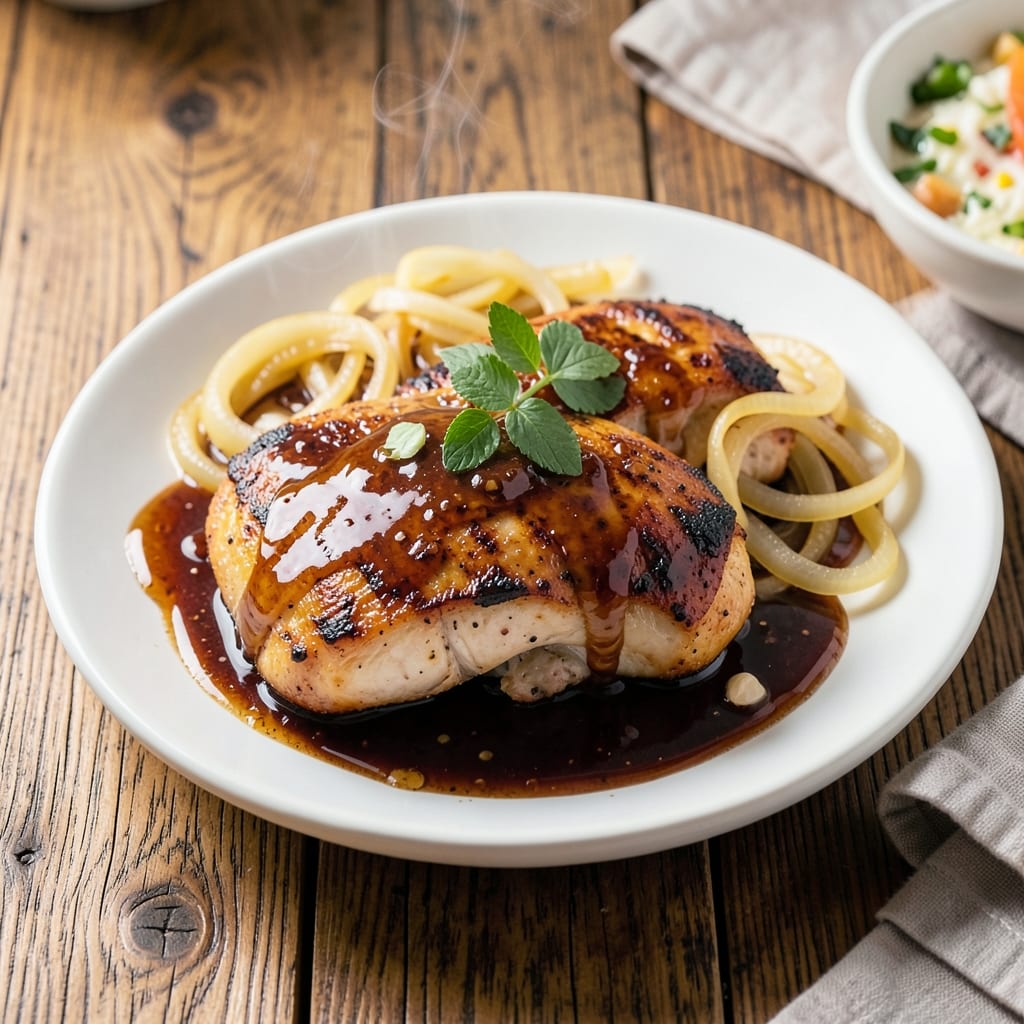
This apple cider BBQ chicken breast recipe transforms simple weeknight dinners into a restaurant-worthy feast with just one pan and 45 minutes. The secret? A smoky-sweet glaze made from reduced apple cider that caramelizes into a sticky, flavorful crust while keeping the chicken juicy inside. I perfected this technique after years of experimenting with slow-smoked chicken—now you can achieve that same depth of flavor without a smoker.
The magic happens when the apple cider simmers into a thick, aromatic sauce that clings to the chicken, creating a balance of tangy sweetness and smoky warmth. We'll start with a simple marinade to tenderize the chicken, then build the glaze right in the same pan. This method ensures maximum flavor penetration while keeping the cooking process straightforward—no complicated steps or special equipment required.
By the time you're done, you'll have golden-brown chicken breasts with a caramelized glaze that's irresistibly sticky and packed with flavor. The apple cider adds a subtle sweetness that pairs perfectly with the smoky BBQ notes, creating a sauce that's rich enough to serve as a dip for extra pieces. The chicken stays moist and tender thanks to a precise cooking method that monitors internal temperature.
Serve this with roasted potatoes for a hearty meal or pair it with a fresh green salad to balance the richness. The glaze works beautifully as a dipping sauce too—just set out some extra chicken pieces and let everyone dig in. This recipe delivers professional-quality results with minimal effort, making it perfect for both weeknight dinners and special occasions.
Ingredients for apple cider bbq chicken breast
Simple ingredients that transform into restaurant-quality apple cider BBQ chicken with caramelized glaze.
| Ingredient | Amount | Notes |
|---|---|---|
| Boneless, Skinless Chicken Breasts 🍗 | 1 ½ lb | Pounded to even thickness |
| Apple Cider 🍎 | 1 ½ cups | Unfiltered preferred for depth |
| Pure Maple Syrup 🍁 | ¼ cup | Grade B for smoky notes |
| Tomato Paste 🍅 | ¼ cup | Canned, no salt added |
| Yellow Onion 🧅 | 1 whole | Diced, yellow or red |
| Garlic Cloves 🧄 | 4 cloves | Minced, fresh preferred |
| Apple Cider Vinegar 🍇 | 2 tbsp | For tangy balance |
| Smoked Paprika 🌶️ | 1 tbsp | For authentic smoky flavor |
| Dijon Mustard 🍯 | 1 tbsp | For depth of flavor |
| Olive Oil 🫒 | 2 tbsp | Extra-virgin for richness |
| Salt 🧂 | 1 ½ tsp | Kosher or sea salt |
| Black Pepper 🌶️ | ½ tsp | Freshly ground preferred |
| Honey 🍯 | 1 tbsp | Optional for extra sweetness |
The apple cider is the star here—unfiltered brands like Woodchuck or Angry Orchard have the best depth of flavor. Look for ones with no added sugar. If you can't find unfiltered, regular cider works fine, but it'll be slightly less complex. The smoked paprika is essential for that authentic BBQ smokiness—Penzeys or McCormick have great options. For the chicken, boneless, skinless breasts are easiest, but if you want extra flavor, leave the skin on. Just remember to remove it before glazing. The tomato paste adds richness without overpowering the apple cider's natural sweetness.
No maple syrup? Substitute with agave nectar at the same amount, though the flavor won't be identical. Running short on apple cider vinegar? White vinegar or balsamic vinegar work in a pinch, but reduce the amount slightly to avoid over-acidity. The honey is optional but recommended—it enhances the caramelization. For a quicker prep, use pre-minced garlic from a jar, though fresh is always better. The Dijon mustard can be swapped for regular yellow mustard if you're out, but it'll lack some depth. If you're making this ahead, prep the marinade and store it in the fridge for up to 3 days.
The glaze thickens as it cooks, so don't worry if it looks runny at first. Store leftovers in an airtight container in the fridge for up to 4 days. The chicken reheats beautifully—just cover with foil and warm in the oven at 350°F for 10-15 minutes. For extra flavor, save any leftover glaze and store it separately. It makes a fantastic dipping sauce for the chicken or even as a topping for roasted potatoes. Freeze the glaze in ice cube trays for easy portioning later.
Why You'll Love This Recipe
- Fewer Ingredients, Big Payoff: I swear by this recipe because it’s that good—just six core ingredients transform plain chicken into something smoky-sweet and irresistible. No fancy pantry staples, no hunting for obscure spices; the apple cider and maple syrup do all the heavy lifting while you chop one onion.
- Sticky-Sweet Magic: That caramelized tomato paste and onion base? It clings to the chicken like a hug, balancing the tangy cider with a deep, savory richness. The maple syrup adds this just-right sweetness that makes it taste like autumn in every bite—no one ever guesses it’s this simple.
- Weeknight to Potluck: Make a double batch on Sunday, and you’ve got lunch for Tuesday, a picnic for Saturday, or a crowd-pleaser for your book club. The sauce thickens beautifully when reheated, so it’s just as good cold in wraps or warm over mashed potatoes.
- Leftovers That Don’t Suck: Between us, most BBQ chicken turns dry or gluey when reheated. Not this. The apple cider keeps it moist, and the maple-glazed edges stay crispy. I’ve packed this for work four days in a row—no sad, rubbery chicken here. Just flavor that hits the spot.
Step-by-step instructions for apple cider BBQ chicken breast
Here's how to create a perfectly balanced glaze that caramelizes beautifully while keeping the chicken juicy.
Prepare the Chicken and Base Ingredients
Place the 1.5 lb boneless, skinless chicken breasts between two sheets of plastic wrap and pound them to an even ½-inch thickness using a meat mallet. This ensures even cooking and prevents dryness in the center. Season both sides generously with 1.5 tsp salt and 0.5 tsp black pepper, pressing the seasoning into the meat so it adheres well.
In a medium bowl, whisk together the 1.5 cups apple cider, 0.25 cup pure maple syrup, 0.25 cup tomato paste, 2 tbsp apple cider vinegar, 1 tbsp Dijon mustard, 1 tbsp smoked paprika, and 1 tbsp honey. This mixture forms the foundation of your glaze, balancing sweetness, acidity, and smoky depth. Let it sit at room temperature while you prepare the chicken.
Sear the Chicken and Build the Glaze
Heat a large oven-safe skillet over medium-high heat and add 2 tbsp olive oil. Once the oil shimmers, add the pounded chicken breasts and cook for 4-5 minutes per side until they develop a golden-brown crust. The chicken should release easily from the pan—this indicates it's ready for the next step. Remove the chicken and set it aside on a plate.
Reduce the heat to medium and add the diced 1 whole yellow onion and 4 cloves minced garlic to the skillet. Sauté for 3-4 minutes until the onions soften and the garlic becomes fragrant. Pour in the prepared glaze mixture and bring it to a gentle simmer, stirring occasionally. Let it reduce by about half—this concentrated flavor will cling beautifully to the chicken.
Caramelize the Glaze and Finish the Chicken
Return the chicken to the skillet, spooning the reduced glaze evenly over the top. Transfer the skillet to a preheated 375°F oven and bake for 15-18 minutes, or until the chicken reaches an internal temperature of 165°F. The glaze should thicken and caramelize, forming a glossy, sticky coating. If the glaze thickens too much before the chicken is done, add 1-2 tablespoons of water to loosen it.
For the final touch, broil the chicken for 2-3 minutes until the glaze bubbles and darkens slightly, creating a beautiful caramelized crust. Watch closely to avoid burning. Remove from the oven and let the chicken rest for 5 minutes before slicing. This resting period ensures the juices redistribute, keeping each bite tender and flavorful.
Serve with Perfectly Balanced Glaze
Slice the chicken against the grain into ½-inch thick pieces and serve immediately, spooning the caramelized glaze generously over the top. The sauce should be thick enough to coat the chicken but still flow slightly when poured. Serve with roasted vegetables or crusty bread to soak up any extra glaze. The combination of smoky, sweet, and tangy flavors makes this dish versatile for weeknight dinners or special occasions.
Pro Tips For Making Apple Cider Bbq Chicken Breast
- START HOT, THEN SLOW: The first 3 minutes in a screaming-hot pan with a splash of apple cider—no crowding—gets you a deep caramelized crust before the sauce takes over. After that, drop the heat to medium-low and let the chicken finish cooking in the sauce, or you’ll end up with steamed chicken and a sticky mess.
- SWEAT THE ONION FIRST: Chop the onion into ¼-inch dice and cook it in the same pan for 5 minutes before adding anything else. This draws out moisture and builds flavor into the pan’s fond, which dissolves right into your sauce when you deglaze with apple cider. (Yes, even if you’re impatient like me.)
- DON’T SKIP THE TOMATO PASTE: That little can of tomato paste isn’t just for color—it thickens the sauce and balances the sweetness of the maple syrup. Mix it into the cider after the onions sweat, then let it cook for 2 minutes before adding the maple syrup. This prevents a cloyingly sweet glaze and keeps the sauce from turning into syrup.
- REST THE CHICKEN UNDER FOIL: Pull the chicken out of the pan when it hits 165°F, tent it loosely with foil, and let it sit for 5 minutes. This keeps the juices from pooling out when you slice, and the residual heat finishes cooking it just right. (I learned this the hard way—dry, rubbery chicken is no one’s idea of a good time.)
Storing and reheating your apple cider bbq chicken breast
Refrigerator Storage
Let your apple cider BBQ chicken cool completely before storing—about 30-45 minutes—to prevent condensation that can make it soggy. Transfer to an airtight container with a tight lid and refrigerate for up to 4 days. I like using glass Pyrex containers because they keep the glaze from absorbing plastic flavors. The chicken and glaze actually taste better the next day as flavors meld together. 🥗
Freezer-Friendly Tips
For longer storage, freeze the cooked chicken and glaze separately. Place the chicken in a freezer-safe bag with parchment paper between pieces to prevent sticking, and store the glaze in a separate small airtight container. This combo keeps for up to 3 months. When ready to eat, thaw overnight in the fridge—never at room temperature—and reheat gently. 🧊
Oven Reheating Method
My preferred way to reheat is in the oven at 350°F for 10-15 minutes, covered loosely with foil. This preserves the caramelized glaze while gently warming the chicken. Add 1 tablespoon of water to the container before reheating if the glaze looks too thick. The residual moisture helps restore its glossy texture. 🔥
Microwave Shortcuts
For a quick fix, cover the chicken with a damp paper towel and microwave on 50% power for 1-2 minutes. Stir the glaze halfway through to redistribute it evenly. Avoid full power—it can make the chicken rubbery. If the glaze separates, give it a quick stir with a fork to re-emulsify before serving. ⚡
Glaze Revival Tricks
If your leftover glaze thickens too much, thin it with 1 teaspoon of apple cider or water and warm it gently on the stovetop. For extra richness, stir in ½ teaspoon of butter while reheating. The glaze also makes a fantastic dipping sauce—simmer it for 2-3 minutes to restore its silky consistency. 💫
Make-Ahead Glaze
Prep the glaze ahead of time by making it up to 2 days in advance and storing it in the fridge. When ready to cook, simply reduce it by half as directed in the recipe. This saves time on busy weeknights while ensuring maximum flavor development. I often do this when hosting—it’s a game-changer for stress-free entertaining! 💡
Nutrition facts
Frequently asked questions about apple cider BBQ chicken breast
Why does the recipe call for pounded chicken breasts?
Pounding the chicken to ½-inch thickness ensures even cooking and prevents dryness in the center. Thicker pieces take longer to cook, risking overcooking the outer edges while the inside stays underdone. This method guarantees juicy, perfectly cooked chicken every time.
Can I use chicken thighs instead of breasts?
Chicken thighs have more fat, which makes them more forgiving and flavorful. Just reduce the cooking time to 12-15 minutes in the oven (they cook faster than breasts) and check for doneness at 165°F. The skin will crisp beautifully with the glaze.
What's the best way to thicken the glaze if it's too runny?
Simmer the glaze uncovered for 5-7 extra minutes to reduce it further. For an instant fix, mix 1 teaspoon cornstarch with 1 tablespoon cold water, stir into the glaze, and cook for 1-2 minutes until thickened. Avoid adding too much—it can make the sauce grainy.
How do I know when the chicken is fully cooked?
Use a meat thermometer to check the thickest part of the chicken—it should read 165°F. The glaze will continue caramelizing even after reaching this temperature, so don't overcook based on color alone. If you don't have a thermometer, cut into the thickest part—juices should run clear, not pink.
Can I make this in a slow cooker instead of an oven?
Yes! After searing the chicken, transfer everything to a slow cooker and cook on Low for 3-4 hours or High for 2 hours. The glaze will thicken naturally. For extra caramelization, broil for 2-3 minutes at the end. The slow cooker method is perfect for hands-off prep.