
Main Courses
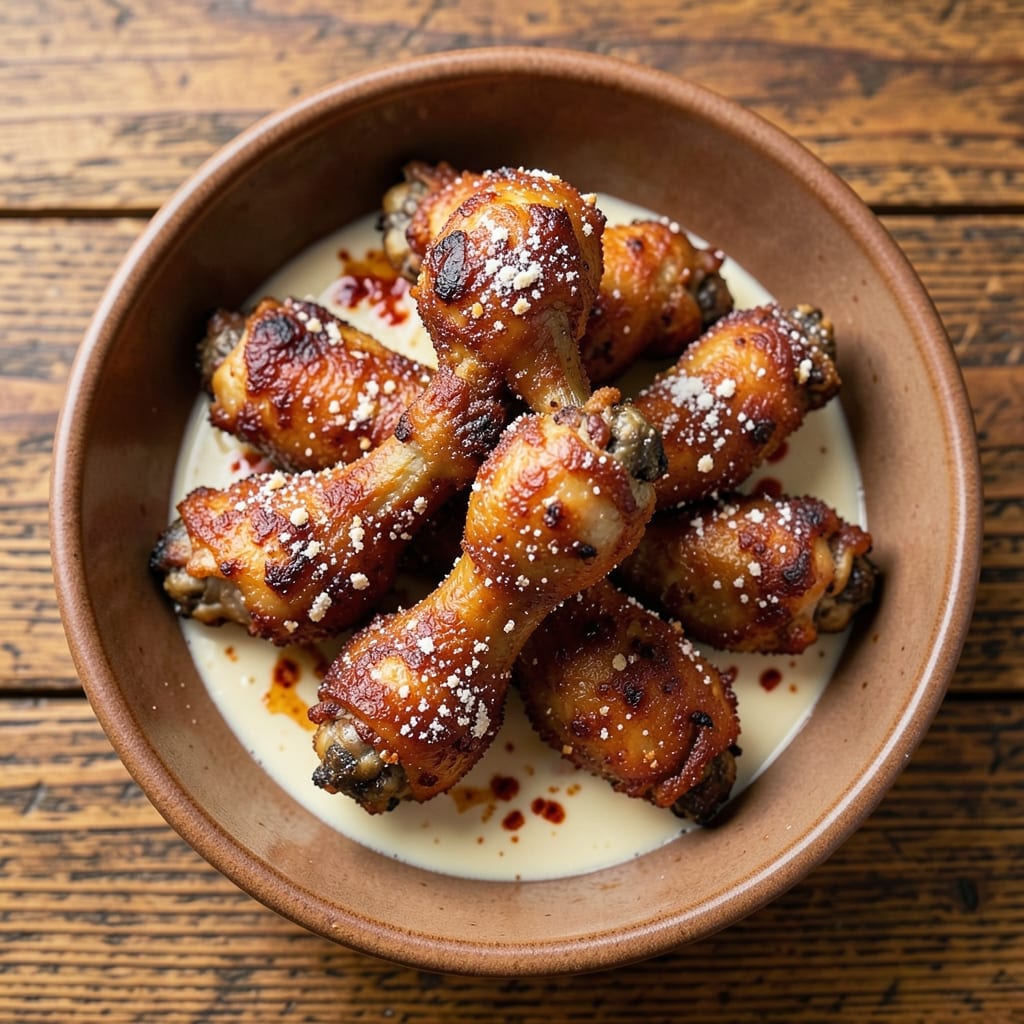
Oven-baked fried chicken drumsticks deliver that same golden, crispy magic without the deep-frying mess. After years of perfecting this technique—including a 30-minute marinade that keeps the meat juicy—I’ve cracked the code for restaurant-quality crunch in your home oven. The secret? A double-breading method that locks in moisture while creating that irresistible crust.
What makes this recipe truly best is the balance: crispy, shatteringly crunchy skin that stays that way even after resting, paired with tender, flavorful meat inside. No deep fryer needed—just a simple baking technique that cuts down on grease while delivering the same addictive texture. The marinade (buttermilk, hot sauce, and spices) does the heavy lifting, while the double breading ensures that crispy perfection.
By the time these drumsticks emerge from the oven, they’ll be golden-brown and sizzling hot, with a crust that’s so crisp it’ll make you forget you didn’t deep-fry them. The buttermilk tenderizes the meat, while the baking powder in the breading creates that signature airy crunch. Serve with classic sides like coleslaw or mashed potatoes for a meal that feels indulgent without the guilt.
This method works for any occasion—game day, family dinners, or a cozy weeknight treat. The best part? You can prep the drumsticks ahead of time and bake them straight from the fridge, making it the perfect make-ahead recipe. Let’s get started on that crispy, juicy perfection.
Ingredients for best oven baked fried chicken drumsticks
Crispy, juicy drumsticks with zero deep-frying mess—just 14 ingredients for restaurant-style crunch.
| Ingredient | Amount | Notes |
|---|---|---|
| Chicken Drumsticks 🍗 | 1 ½ lb | Bone-in, skin-on preferred |
| Buttermilk 🥛 | 1 cup | Full-fat for best flavor |
| Hot Sauce 🌶️ | 1 tbsp | Like Frank's RedHot |
| All-Purpose Flour 🌾 | 1 cup | For first breading |
| Cornstarch 🌾 | ½ cup | For crispier crust |
| Baking Powder 🍞 | 1 tbsp | For extra crunch |
| Salt 🧂 | 1 tbsp | Kosher or sea salt |
| Black Pepper 🌶️ | 1 tsp | Freshly ground |
| Paprika 🌶️ | 1 tbsp | Smoked for color |
| Garlic Powder 🧄 | 1 tsp | For depth of flavor |
| Onion Powder 🧅 | 1 tsp | Balances spices |
| Large Eggs 🥚 | 2 whole | Room temperature |
| Panko Breadcrumbs 🍞 | 1 ½ cups | For second breading |
| Vegetable Oil 🫒 | 2 tbsp | For greasing pan |
The chicken drumsticks make all the difference—bone-in, skin-on pieces stay juicier. Trader Joe's or Costco usually have them pre-cut, but if you're buying whole, look for good marbling. Buttermilk is non-negotiable here—it tenderizes the meat while adding that tangy flavor. I always grab the full-fat version (the good stuff, not the low-fat kind) because it makes the crust extra crispy. The hot sauce? Frank's RedHot is my go-to, but any bold, vinegary sauce works—just don't use sweet BBQ sauce.
No buttermilk? Substitute with milk plus 1 tbsp vinegar or lemon juice—let it sit for 10 minutes to curdle. Running short on cornstarch? Extra flour in the first breading works, but you'll lose some crispiness. No panko? Regular breadcrumbs plus 1 tbsp cornstarch mimics that airy texture. The spices are flexible—swap smoked paprika for regular if that's what you've got, but keep the garlic and onion powders. Pro tip: Toast your spices in a dry pan for 30 seconds before mixing to wake up their flavors.
Prep ahead is where this recipe shines—marinate the drumsticks overnight if you can, but even 30 minutes makes a difference. Store the unbaked drumsticks in the fridge for up to 2 days or freeze them for 3 months. Bake straight from the fridge if you're short on time—just add 10 minutes to the cooking time. The breading stays crispy for about 20 minutes after baking, so serve immediately with your favorite dipping sauces.
Why You'll Love This Recipe
- No Fuss Setup: I swear by this method—just drumsticks, a bowl for buttermilk, and one pan. No deep-fryer, no messy breading station. The cornstarch mix sticks like glue, so no flaking drama either.
- Spicy Crispy Magic: That hot sauce in the marinade? Chef’s kiss. The buttermilk tenderizes while the oven gives you a golden crust that shatters at the slightest touch—juicy inside, fiery outside. My kids fight over the last piece.
- Game for Any Gathering: Serve it at tailgates, family dinners, or when your roommate’s “vegan friends” come over. The leftovers reheat beautifully (yes, even the crisp), and it’s cheap enough to make for a crowd without breaking the bank.
- Budget Meal, Big Payoff: Drumsticks are the most economical cut, and this recipe stretches ingredients further than takeout. Honestly, I’ve fed six people for under $15 with this—plus, the hot sauce kick makes it feel fancy without the price tag.
Step-by-step instructions for double-crusted oven-baked chicken drumsticks
Here's how to achieve that legendary crispy, crunchy crust without a single drop of deep fryer oil.
Marinate the Drumsticks for Maximum Flavor
Place the 1.5 lb chicken drumsticks in a large bowl. In a separate bowl, whisk together the 1 cup buttermilk and 1 tbsp hot sauce until smooth. Pour this marinade over the drumsticks, making sure they're fully coated. Let them soak for at least 30 minutes—I like to do this in the fridge for up to 4 hours for deeper flavor penetration.
This step is non-negotiable. The buttermilk tenderizes the meat while the hot sauce adds a subtle kick that shines through the crust. If you're short on time, even 15 minutes will help, but longer marinating equals more flavorful results.
Prepare the Dry Breading Stations
In a shallow bowl, whisk together the 1 cup all-purpose flour, 0.5 cup cornstarch, 1 tbsp baking powder, 1 tbsp salt, 1 tsp black pepper, 1 tbsp paprika, 1 tsp garlic powder, and 1 tsp onion powder. This is your first breading layer—it's what creates that initial crispy barrier. In another bowl, beat the 2 whole large eggs until just combined. In a third bowl, place the 1.5 cups panko breadcrumbs—this will be your final crunchy layer.
I like to work in this order: flour mix first, then eggs, then panko. This keeps everything organized and prevents cross-contamination. Make sure all your ingredients are at room temperature—cold eggs won't coat properly, and cold flour mix can make the crust gummy.
Double-Bread for Maximum Crunch
Remove the drumsticks from the buttermilk, letting any excess drip off. Working one at a time, dredge each piece in the flour mixture, pressing gently to adhere. Shake off any excess, then dip into the beaten eggs, allowing any excess to drip off. Finally, roll each piece in the panko breadcrumbs, pressing firmly to create an even, thick crust. Place on a wire rack set over a baking sheet—this prevents the breading from getting soggy.
This double-breading technique is what makes these drumsticks truly exceptional. The first layer creates a crispy base, while the panko adds that satisfying crunch. Don't skip the pressing step—it ensures the breading sticks and creates that perfect texture we're after.
Preheat and Arrange for Perfect Airflow
Preheat your oven to 425°F. Line a large baking sheet with parchment paper and lightly grease it with 2 tbsp vegetable oil—this prevents sticking and helps create extra crispiness. Arrange the breaded drumsticks in a single layer, leaving about 1 inch between each piece. This spacing is crucial—it allows hot air to circulate freely, ensuring even browning and crisping on all sides.
I like to place the drumsticks skin-side up initially. The skin will crisp up nicely while the meat cooks through. If you're worried about the skin sticking, you can place them skin-side down first, then flip halfway through baking.
Bake to Golden Perfection
Bake the drumsticks for 45 minutes, flipping them halfway through at the 22-minute mark. You'll know they're ready when the crust is deep golden brown and the internal temperature reaches 165°F at the thickest part of the meat. The breading should be crispy and crunchy—if it's not quite there, return to the oven for another 5-10 minutes until golden.
Let the drumsticks rest for 5 minutes before serving. This resting period allows the juices to redistribute, ensuring each bite is moist and flavorful. Serve immediately with your favorite dipping sauce—these are best enjoyed right out of the oven while the crust is at its crispest.
Pro Tips For Making Best Oven Baked Fried Chicken Drumsticks
- CRANK THE OVEN TO 425°F: I used to bake these at 375°F like a good little rule-follower, but the crust never got that shatteringly crisp texture. At 425°F, the drumsticks hit the oven screaming—yes, it’s aggressive—but the first 15 minutes at high heat render fat fast and lock in that golden crust. After that, drop to 350°F for the rest of the time. (Your kitchen will smell like heaven, and the crust will behave.)
- DRY THE DRUMSTICKS LIKE A DESERT: Pat those drumsticks dry with paper towels—this isn’t optional. I learned this the hard way after a batch turned out soggy and sad. Wet skin = steam = a crust that clings like wet newspaper. Give them a good rub with a towel, especially where the meat meets the bone. (If you’re impatient like me, let them air-dry on a rack for 30 minutes before buttermilk.)
- MIX CORNSTARCH INTO THE FLOUR: Skip the separate dredge—just toss 2 tablespoons of cornstarch right into your flour mix. This isn’t just a shortcut; it makes a real difference. The cornstarch absorbs moisture like a sponge, keeping the crust extra crispy instead of gummy. My grandmother swore by this, and she was right: the drumsticks stay crunchy even after sitting on the counter for hours.
- REST THE DRUMSTICKS AFTER BUTTERMILK: After soaking in the buttermilk-hot sauce marinade, let the drumsticks sit uncovered in the fridge for at least 2 hours—or overnight if you’re planning ahead. This isn’t just about flavor; it’s about texture. The cornstarch in the flour needs time to gel slightly, and the meat absorbs just enough liquid to stay juicy without turning to mush. (Yes, even if you’re impatient like me.)
Common mistakes when making this recipe
Skipping the Marinade
I learned this the hard way—skipping the buttermilk marinade is a huge mistake. The acid in buttermilk tenderizes the meat while the hot sauce adds depth. If you rush this step, your drumsticks will turn out dry and flavorless. Even 15 minutes makes a difference, but I recommend 30 minutes minimum for best results. 🌶️
Overcrowding the Pan
Packing too many drumsticks on the baking sheet creates steam instead of crispy crusts. The breading needs room to crisp properly, so leave 1 inch between each piece. I once baked a full sheet of drumsticks with no space, and they came out soggy—never again! Arrange them in a single layer for even cooking.
Not Pressing the Breading
The breading sticks best when you press it firmly against the meat. I see people just rolling the drumsticks through the panko without pressing, and that’s how you get half the crust falling off. Press gently but firmly—this ensures maximum crunch and adhesion. Think of it like tucking in a blanket: snug but not tight.
Baking at the Wrong Temperature
Ovens vary, but 425°F is your sweet spot for crispy drumsticks. Too low, and the breading turns gummy; too high, and the outside burns before the inside cooks. Use an oven thermometer to confirm your oven’s accuracy. If your crust isn’t crispy, bump the temp to 450°F for the last 5 minutes of baking.
Flipping Too Late or Too Early
Flipping at the 22-minute mark ensures even browning, but timing is everything. Flip too early, and the breading won’t crisp; too late, and you risk burning. Set a timer so you don’t forget. Also, flip gently—don’t toss them around like popcorn! A steady hand keeps the crust intact.
Skipping the Resting Time
Serving these drumsticks immediately after baking means juices will spill everywhere when you cut in. Let them rest for 5 minutes—this lets the meat reabsorb its own juices. I once served a batch straight out of the oven, and the first bite was a sad, dry mess. Patience pays off with juicy, flavorful meat every time. 💪
Nutrition facts
Frequently asked questions
Can I use boneless chicken drumsticks?
I recommend bone-in, skin-on drumsticks for the best results—they stay juicier and the skin crisps beautifully. Boneless versions will cook faster and may dry out, but if that's all you have, reduce baking time by 5-7 minutes and check for doneness early. The texture won't be identical, but it'll still be delicious!
How do I make this recipe air fryer-friendly?
For an air fryer version, preheat to 375°F and cook in batches (don't overcrowd!). Spray the basket with oil and cook for 18-20 minutes, flipping halfway. The air fryer gives slightly less crispiness than the oven, but it's still fantastic. Use the same breading technique—just reduce the time by about half compared to oven baking.
What's the best way to reheat leftover drumsticks?
Reheat in a 350°F oven for 10-15 minutes to restore crispiness. For quick reheating, use the air fryer at 350°F for 3-4 minutes. Avoid microwaving—it turns the breading soggy. To refresh the crust, sprinkle with a little water and broil for 1-2 minutes at the end.
Can I use this breading for other chicken pieces?
This double-breading method works perfectly for thighs, wings, or even chicken tenders. For wings, reduce baking time to 25-30 minutes (flip at 15 minutes). For thighs, increase to 50-55 minutes—just monitor closely. The same marinade and breading ratios apply to all pieces.
Why did my crust turn out pale instead of golden?
Pale crusts usually mean one of three things: the oven wasn't hot enough (425°F is crucial), the breading wasn't pressed firmly, or the drumsticks weren't spaced properly. Try broiling for 2-3 minutes at the end for extra color, or increase the oven temp to 450°F for the last 5 minutes of baking.