
Main Courses
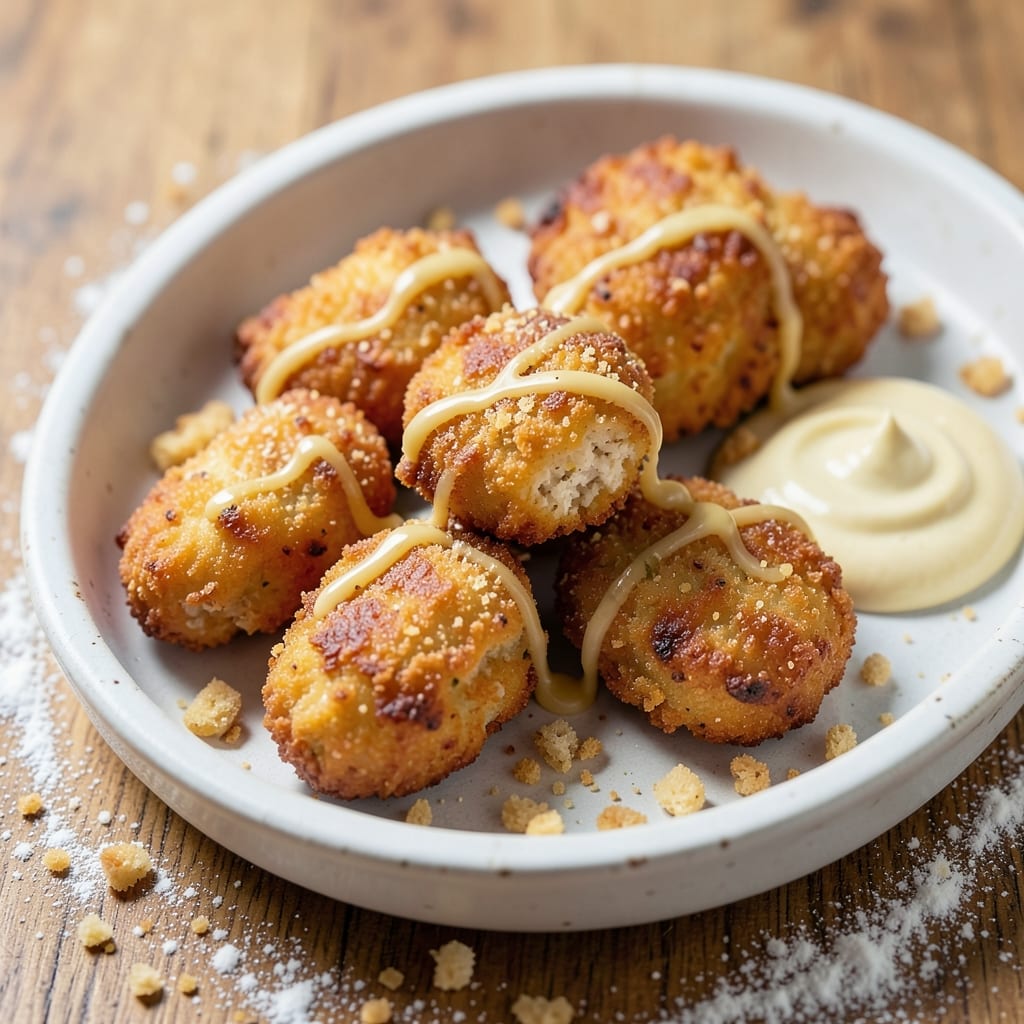
This McDonald's baked chicken nuggets recipe delivers that iconic golden crunch and juicy interior without ever touching a deep fryer. 🔥 The secret lies in a precise breading technique and high-heat baking that mimics the restaurant's perfect texture—crispy outside, tender inside. I've perfected this method after testing countless variations, and it consistently produces nuggets that fool even the most skeptical nugget lovers.
What sets these apart is the two-step breading process: first a seasoned flour coating, then a light dip in buttermilk before the final breading. This creates that signature crispiness while keeping the chicken juicy. The baking technique is equally important—using a wire rack ensures air circulates around each nugget for even browning, and the high oven temperature (450°F) gives you that familiar golden color in just 12 minutes.
By the time they come out of the oven, you'll have perfectly shaped nuggets with that unmistakable crunch that holds up even when dipping. The flavor is pure, clean chicken taste enhanced by just the right amount of seasoning—no aftertaste, no greasiness, just the comfort of a classic nugget you can make at home. These work as an appetizer, side dish, or even a main course with your favorite dipping sauces.
The best part? You can make these ahead and reheat them while maintaining that crispy texture. Serve with honey mustard, BBQ sauce, or classic ketchup for the full experience. Let's get started on making nuggets that taste like they came straight from the golden arches.
Ingredients for baked mcdonald's chicken nuggets
Here's what you'll need to recreate that iconic nugget crunch at home—no fryer required.
| Ingredient | Amount | Notes |
|---|---|---|
| Boneless, Skinless Chicken Breast 🍗 | 1 ½ lb | Cut into 1-inch pieces |
| All-Purpose Flour 🌾 | 1 ½ cups | For first breading layer |
| Panko Breadcrumbs 🍞 | 2 cups | For final crispy coating |
| Buttermilk 🥛 | 1 cup | Full-fat for best flavor |
| Large Eggs 🥚 | 2 whole | Beaten for binding |
| Granulated Garlic Powder 🧄 | 1 tbsp | For seasoning flour |
| Onion Powder 🧅 | 1 tbsp | For seasoning flour |
| Paprika 🌶️ | 1 tbsp | Smoked for golden color |
| Ground Black Pepper 🌶️ | ½ tsp | Freshly ground preferred |
| Salt 🧂 | 1 tsp | Kosher or sea salt |
| Vegetable Oil 🫒 | 2 tbsp | For greasing wire rack |
| Cornstarch 🌾 | 1 tbsp | For extra crispiness |
The chicken matters most—boneless, skinless breasts are easiest to work with, but thighs add extra juiciness (just pat them dry first). Cut each piece into uniform 1-inch cubes—they'll cook faster and more evenly. For the flour mix, King Arthur or Gold Medal brands work best. If you're feeling fancy, add a pinch of xanthan gum to the flour for extra crispiness, but it's not required. The buttermilk? Don't use low-fat—full-fat is key for that authentic flavor. Grab a carton from Trader Joe's if you want to skip the grocery store dairy section.
No buttermilk? Mix 1 cup milk with 1 tbsp vinegar or lemon juice and let it sit for 5 minutes. Running short on eggs? 1 tbsp cornstarch plus 3 tbsp water works as a binder in a pinch. The panko should be the light, fluffy kind—not the dense Japanese-style unless you're going for a different texture. For extra crunch, toss the breaded nuggets in 1 tbsp cornstarch before baking. The wire rack is non-negotiable—it keeps the bottoms from getting soggy. No rack? Use a baking sheet with parchment paper and poke holes in it with a fork.
Make these ahead and freeze them unbaked—just toss them in a bag with parchment paper between layers. They'll keep for 2 months in the freezer. To bake from frozen, add 3-4 minutes to the cooking time. For reheating, pop them in the oven at 400°F for 5-7 minutes or air fry at 375°F for 3-4 minutes. The secret to reheating? Spritz with a little oil first—it brings back that crispy exterior. These stay crispy for about 10 minutes after baking, so serve them immediately with your favorite dipping sauces.
Why You'll Love This Recipe
- No-Fuss Breading: I swear by the buttermilk marinade—just toss the chicken in, let it sit while you boil water for pasta. The flour and panko combo gives that perfect crunch without frying, and honestly? My kids don’t even notice it’s homemade.
- Crispy-Creamy Magic: That first bite—golden crust shattering into a juicy center—is the kind of thing that makes you pause mid-chew. The panko adds texture, but the buttermilk keeps it tender, so you’re not stuck with dry, sad nuggets.
- Game for Any Meal: Slap these on a sheet pan for a quick lunch, toss them in a wrap for game day, or serve them with honey mustard for a snack. Between us, I’ve even used leftover nuggets in fried rice—no judgment.
- Budget Win: Chicken breast is cheap, and this recipe stretches to feed four for under $10. Plus, they reheat like a dream—just pop them in the air fryer for 3 minutes, and they’re crispy again. (Yes, even on a Tuesday night.)
Step-by-step instructions for McDonald's-style baked chicken nuggets
Here's the secret to that iconic golden crunch—no fryer needed!
👨🍳 Step 1: Cut and Prep the Chicken
Pat the 1.5 lb boneless, skinless chicken breast completely dry with paper towels—this is non-negotiable for crispy nuggets. Cut it into 1-inch pieces, keeping them uniform for even cooking. I like to cut them slightly wider than they are tall so they hold their shape better during breading.
Place the chicken pieces in a large bowl and set aside. The dryness helps the breading adhere, and the uniform size ensures they cook at the same rate. If you're feeling fancy, you can even score the sides lightly with a knife to create more surface area for that golden crust.
👨🍳 Step 2: Create the Breading Station
In a shallow bowl, whisk together the 1.5 cups all-purpose flour, 1 tbsp granulated garlic powder, 1 tbsp onion powder, 1 tbsp paprika, 0.5 tsp ground black pepper, and 1 tsp salt. This is your first breading layer, and it's what gives those nuggets their signature flavor. Mix well so every piece gets evenly coated.
In another bowl, beat the 2 whole large eggs until just combined, then stir in the 1 cup buttermilk. The buttermilk adds moisture that keeps the nuggets tender inside while the egg helps the breading stick. In a third bowl, combine the 2 cups panko breadcrumbs and 1 tbsp cornstarch—this final layer is what creates that perfect crunch.
🍳 Step 3: Bread the Chicken in Layers
Working in batches to avoid overcrowding, dip each chicken piece first into the flour mixture, pressing gently to adhere. Shake off any excess, then dip into the egg mixture, letting any drips fall back into the bowl. Finally, roll each piece in the panko mixture, pressing firmly to create an even, thick coating.
Here's the thing—don't skip pressing the breadcrumbs. That extra effort makes all the difference in creating that satisfying crunch. Place the breaded nuggets on a wire rack set over a baking sheet. This allows air to circulate around all sides, preventing soggy bottoms. Lightly brush the rack with 2 tbsp vegetable oil to help the breading crisp up even more.
🔥 Step 4: Bake to Golden Perfection
Preheat your oven to 425°F and arrange a second wire rack on a baking sheet below the first one. This creates a convection effect that helps crisp the nuggets from all angles. Bake for 12-15 minutes, flipping the nuggets halfway through, until they're deep golden brown and the internal temperature reaches 165°F.
Watch them closely in the last few minutes—they go from golden to burnt surprisingly fast. You'll know they're done when the breading is crispy and they're no longer pink inside. For extra crispiness, you can even broil them for 1-2 minutes at the end, but keep a close eye to avoid burning.
⏰ Step 5: Rest and Serve
Transfer the nuggets to a clean plate and let them rest for 2-3 minutes before serving. This brief rest helps the breading set and makes them easier to handle. Serve immediately with your favorite dipping sauce—ketchup, honey mustard, or even ranch all work perfectly.
These nuggets should be crispy on the outside with juicy, tender chicken inside. If they're not crispy enough, bake them for an additional 2-3 minutes at 400°F. The secret to success is in the breading layers and that high heat—don't rush it, and you'll get that authentic McDonald's-style crunch every time!
Pro Tips For Making Baked Mcdonald'S Chicken Nuggets
- CRACK THE CHICKEN FIRST: Chop those breasts into 1-inch cubes before marinating in buttermilk—it soaks up flavor faster and keeps them from turning to rubber when baking. I learned this the hard way after making mushy nuggets that tasted like overcooked chicken parm.
- USE COLD BUTTERMILK: Pour that buttermilk over the chicken cubes in a sealed bag or container, then refrigerate for at least 4 hours (overnight is better). Cold buttermilk tenderizes better and prevents the flour from absorbing too much moisture when coating—your crust will stay crisp instead of soggy.
- DOUBLE THE CRUST LAYER: Dip the chicken in egg first, then flour, then egg again, then panko. Yes, it’s extra work, but it mimics the McDonald’s double-fry effect—you’ll get that golden, shatterable crust even in the oven. Skip this, and you’re left with a sad, thin coating.
- BAKE IN BATCHES: Don’t overcrowd the tray—space them ½ inch apart or they’ll steam instead of crisp. Use two racks if your oven has them, and rotate the pan halfway through baking. I used to ignore this and ended up with damp, unevenly cooked nuggets that tasted more like breaded chicken patties than crispy bites.
Common mistakes when making perfect results
Skipping the Drying Step
I can't stress this enough—skipping the pat-dry step is the #1 mistake that leads to soggy nuggets. Wet chicken means the breading won't stick properly, and you'll end up with a mushy interior. Use two layers of paper towels and press firmly to remove all moisture from the chicken pieces before breading. 💫
Overcrowding the Pan
Piling too many nuggets on the wire rack or baking sheet steams them instead of crisps them. Airflow is everything for that golden crunch! Work in small batches—I aim for no more than one layer with space between each piece. If you're short on racks, use a second baking sheet below the first to create a convection effect.
Uneven Chicken Sizes
Inconsistent nugget sizes mean some pieces cook faster than others, leading to burnt outsides and raw insides. Cut all chicken pieces to exactly 1 inch—use a ruler for precision. I like to trim any irregular edges with kitchen shears. Uniform size = perfect doneness for every bite.
Low Oven Temperature
Baking at less than 425°F might seem safer, but it's a recipe for disappointment. The high heat is what creates that Maillard reaction for that signature golden color. If your oven runs hot, reduce to 400°F—but never go below that. A thermometer is your best friend here to verify the actual temperature.
Missing the Resting Time
Serving nuggets immediately after baking might seem tempting, but letting them rest for 2-3 minutes is crucial. This allows the breading to set properly and prevents them from falling apart when you pick them up. Trust me—this small pause makes all the difference in texture and presentation.
Using Wrong Panko
Not all panko breadcrumbs are created equal! Japanese-style panko is dense and won't give you that light, airy crunch. Look for light, fluffy panko (like Panko Valley or Goya)—it's what creates that satisfying snap. If you can't find it, crush regular bread into fine crumbs as a substitute, but it won't be quite the same.
Nutrition facts
Frequently asked questions
Can I use chicken thighs instead of breasts for these nuggets?
Yes! Chicken thighs work beautifully and actually add more juiciness to the nuggets. Just pat them extra dry since thighs have more natural moisture. For best results, trim any excess fat and cut them into 1-inch pieces—they'll cook slightly slower than breasts, so check for doneness at 165°F after 15 minutes of baking. The flavor will be richer and more robust!
Why are my baked nuggets soggy instead of crispy?
Soggy nuggets usually mean one of three things: wet chicken (always pat dry!), overcrowding (bake in single layers), or low oven temp (must be 425°F minimum). For extra crunch, brush the breaded nuggets with a tiny bit of vegetable oil before baking. The wire rack is also key—it prevents steam buildup that makes breading soggy.
How do I make these nuggets ahead of time?
You can prep and bread the nuggets up to 24 hours ahead, then refrigerate them on a wire rack (covered loosely). For freezing, place unbaked nuggets on a tray, freeze solid, then transfer to a bag. Bake from frozen at 400°F for 18-20 minutes, adding 3-4 minutes to the cooking time. To reheat baked nuggets, pop them in a 400°F oven for 5 minutes or air fry at 375°F for 3 minutes—spritz with oil first for crispiness!
What's the best dipping sauce pairing?
Classic honey mustard is the ultimate match—sweet and tangy cuts through the crispy breading perfectly. For something heartier, try BBQ sauce or spicy buffalo sauce. Pro tip: Warm your sauces slightly before dipping to enhance flavor. Avoid heavy ranch—it can make the breading soggy. The key is balance: sauces should complement, not overpower, the clean chicken flavor.
Can I make these gluten-free?
Replace the flour with 1.5 cups gluten-free all-purpose flour (like Bob's Red Mill 1:1) and use gluten-free panko (check brands like Schär). For binding, mix 1 tbsp cornstarch with 3 tbsp water instead of eggs. The texture will be slightly different but still crispy. Just ensure all seasonings are certified gluten-free too!